In this article
Why I didn't walk away First look: deceptive condition Teardown: drilling, soaking, freeing the fused Electronics: what survived and what didn't Reassembly Pre Power On Tests Moment of truth ReflectionsWhy I didn't walk away
I picked up the SX‑64 at the 2025 VCFSW show in Dallas, thinking the classic line: "How bad could it be?"
The gentleman who brought it to me mentioned it might have some water damage, but on the outside it looked pretty respectable, certainly no worse than others I'd seen. The aluminum alloy case and plastics had held up with just minor scuffs and scratches, which made it easy to believe the machine wasn't too far gone. However, the unsettling noise inside (like sand moving in a jar) told me there was more to the story.
I didn't dare power it on, but I also didn't yet realize how deep the damage went. I made an offer, the deal was done, and I slid it under my table for the rest of the show before bringing it home and shelving it until a couple of weeks ago.
First look: deceptive condition
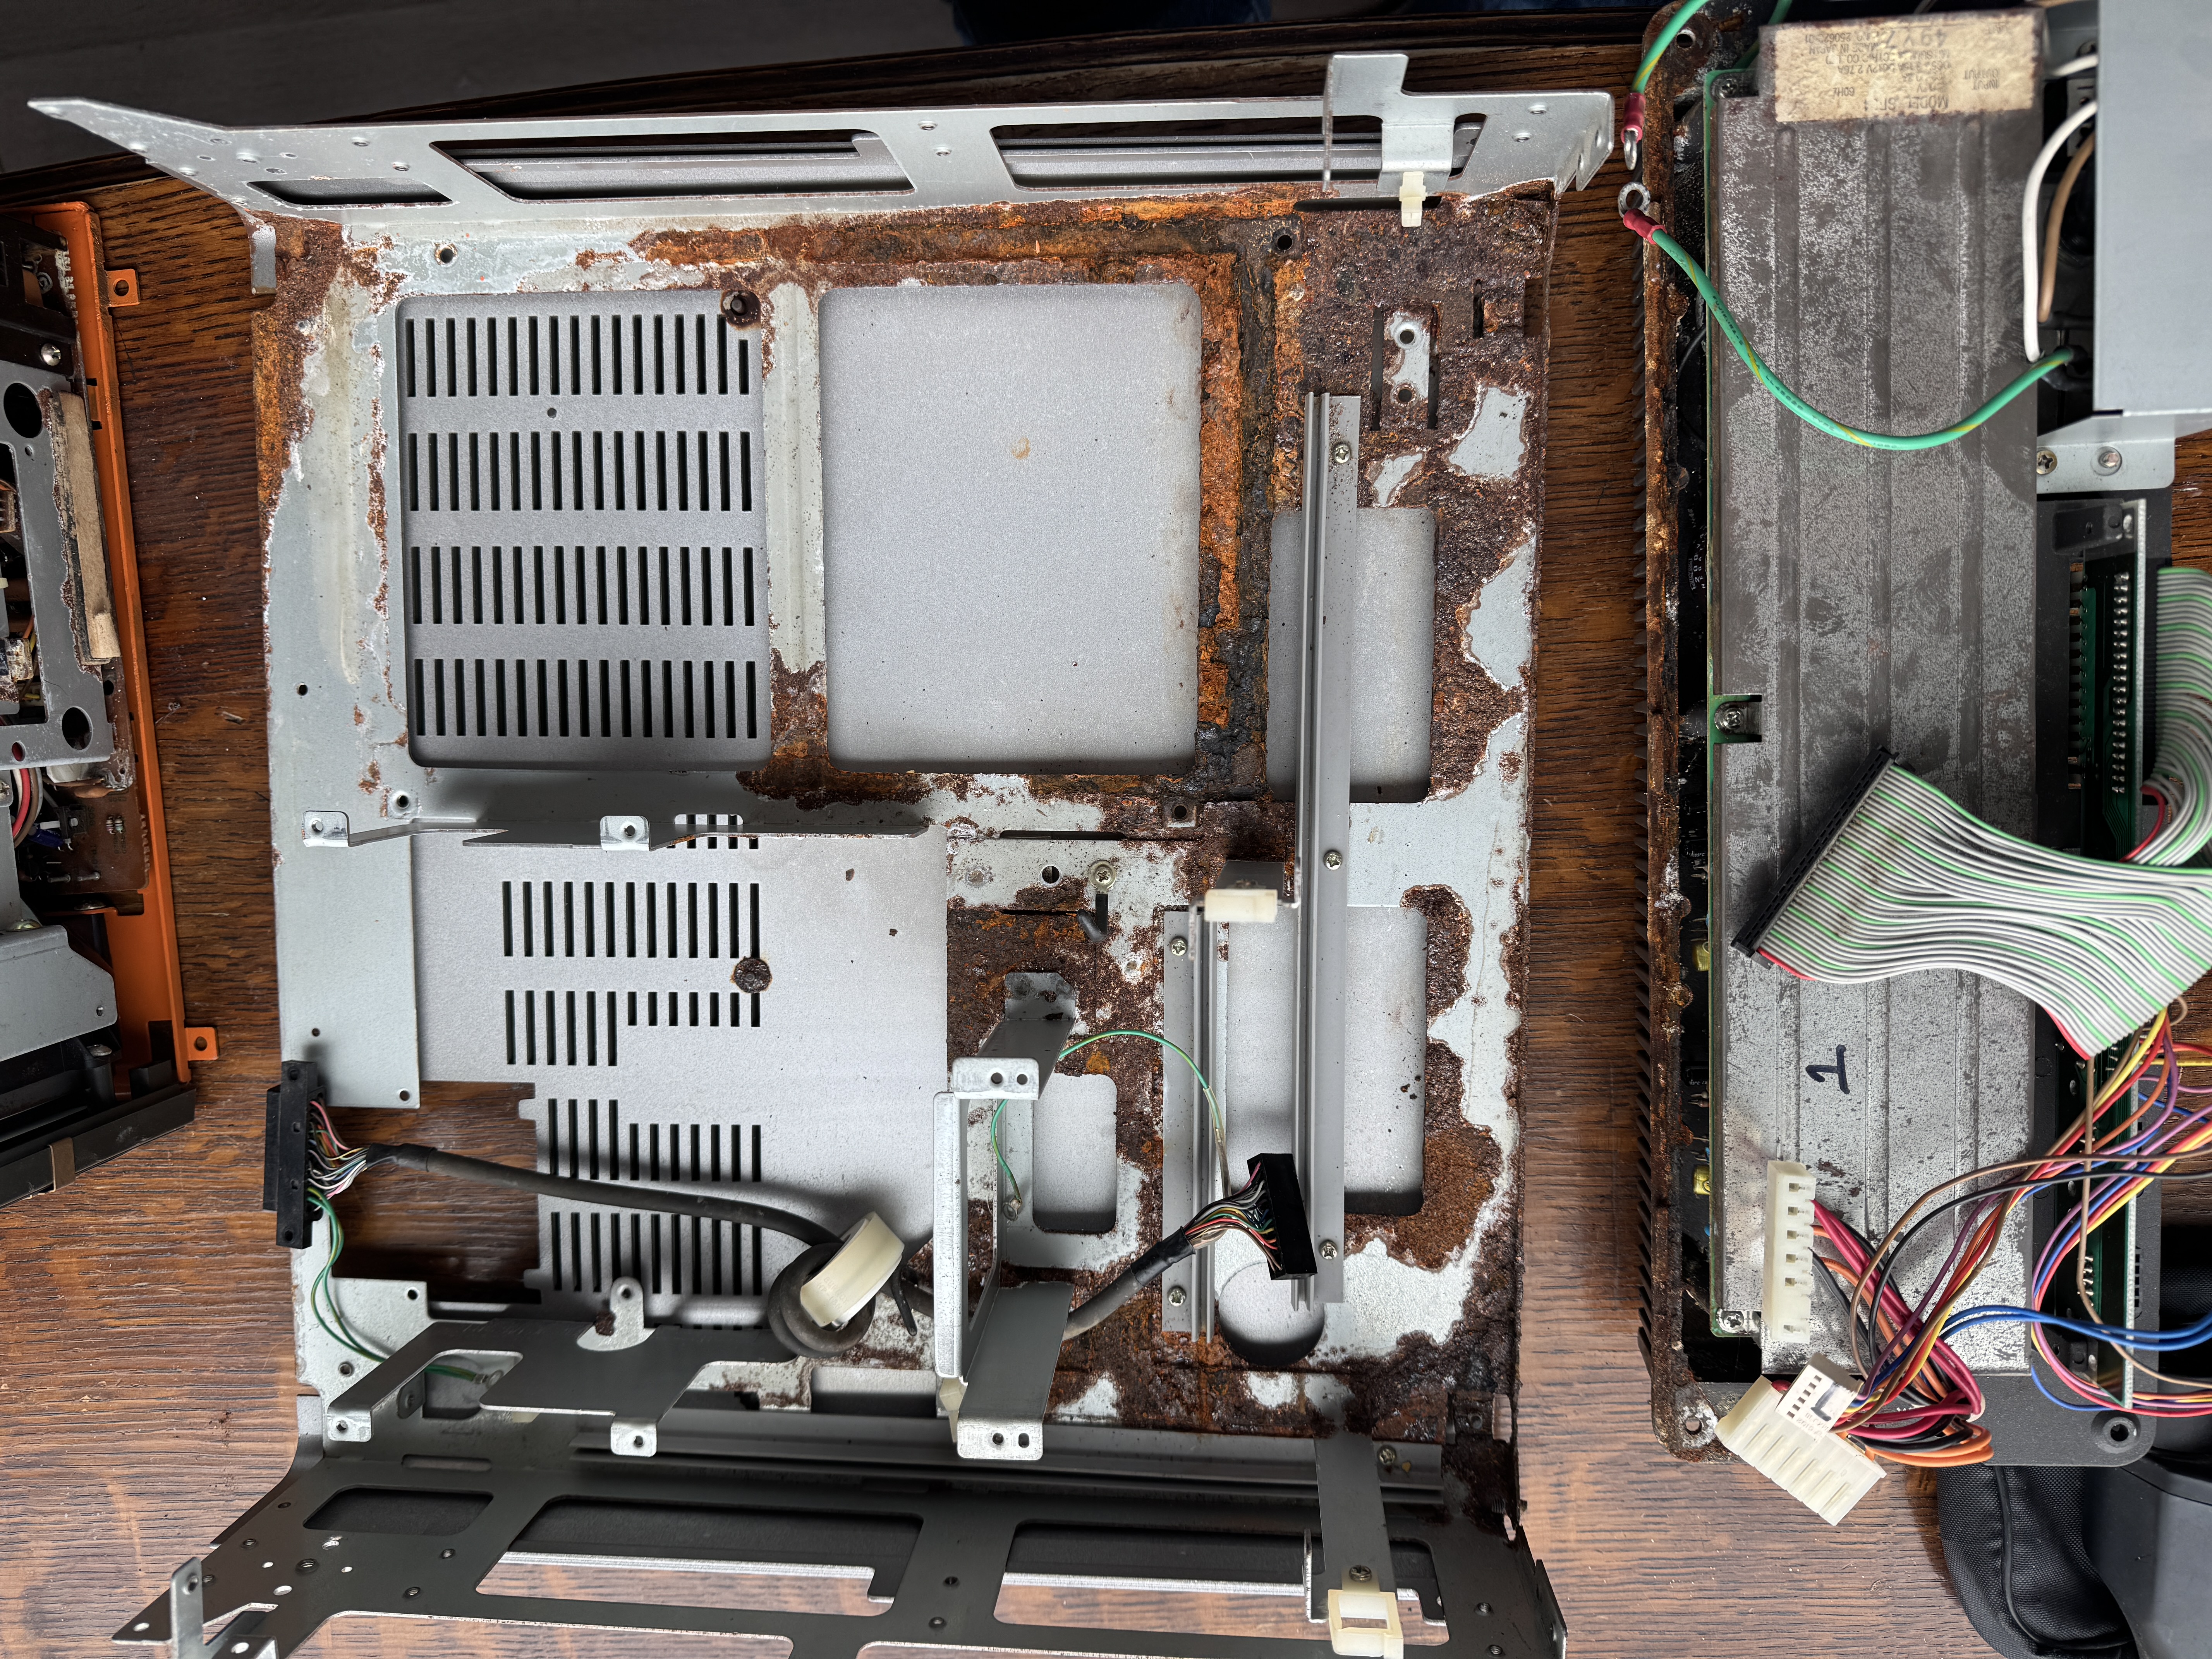
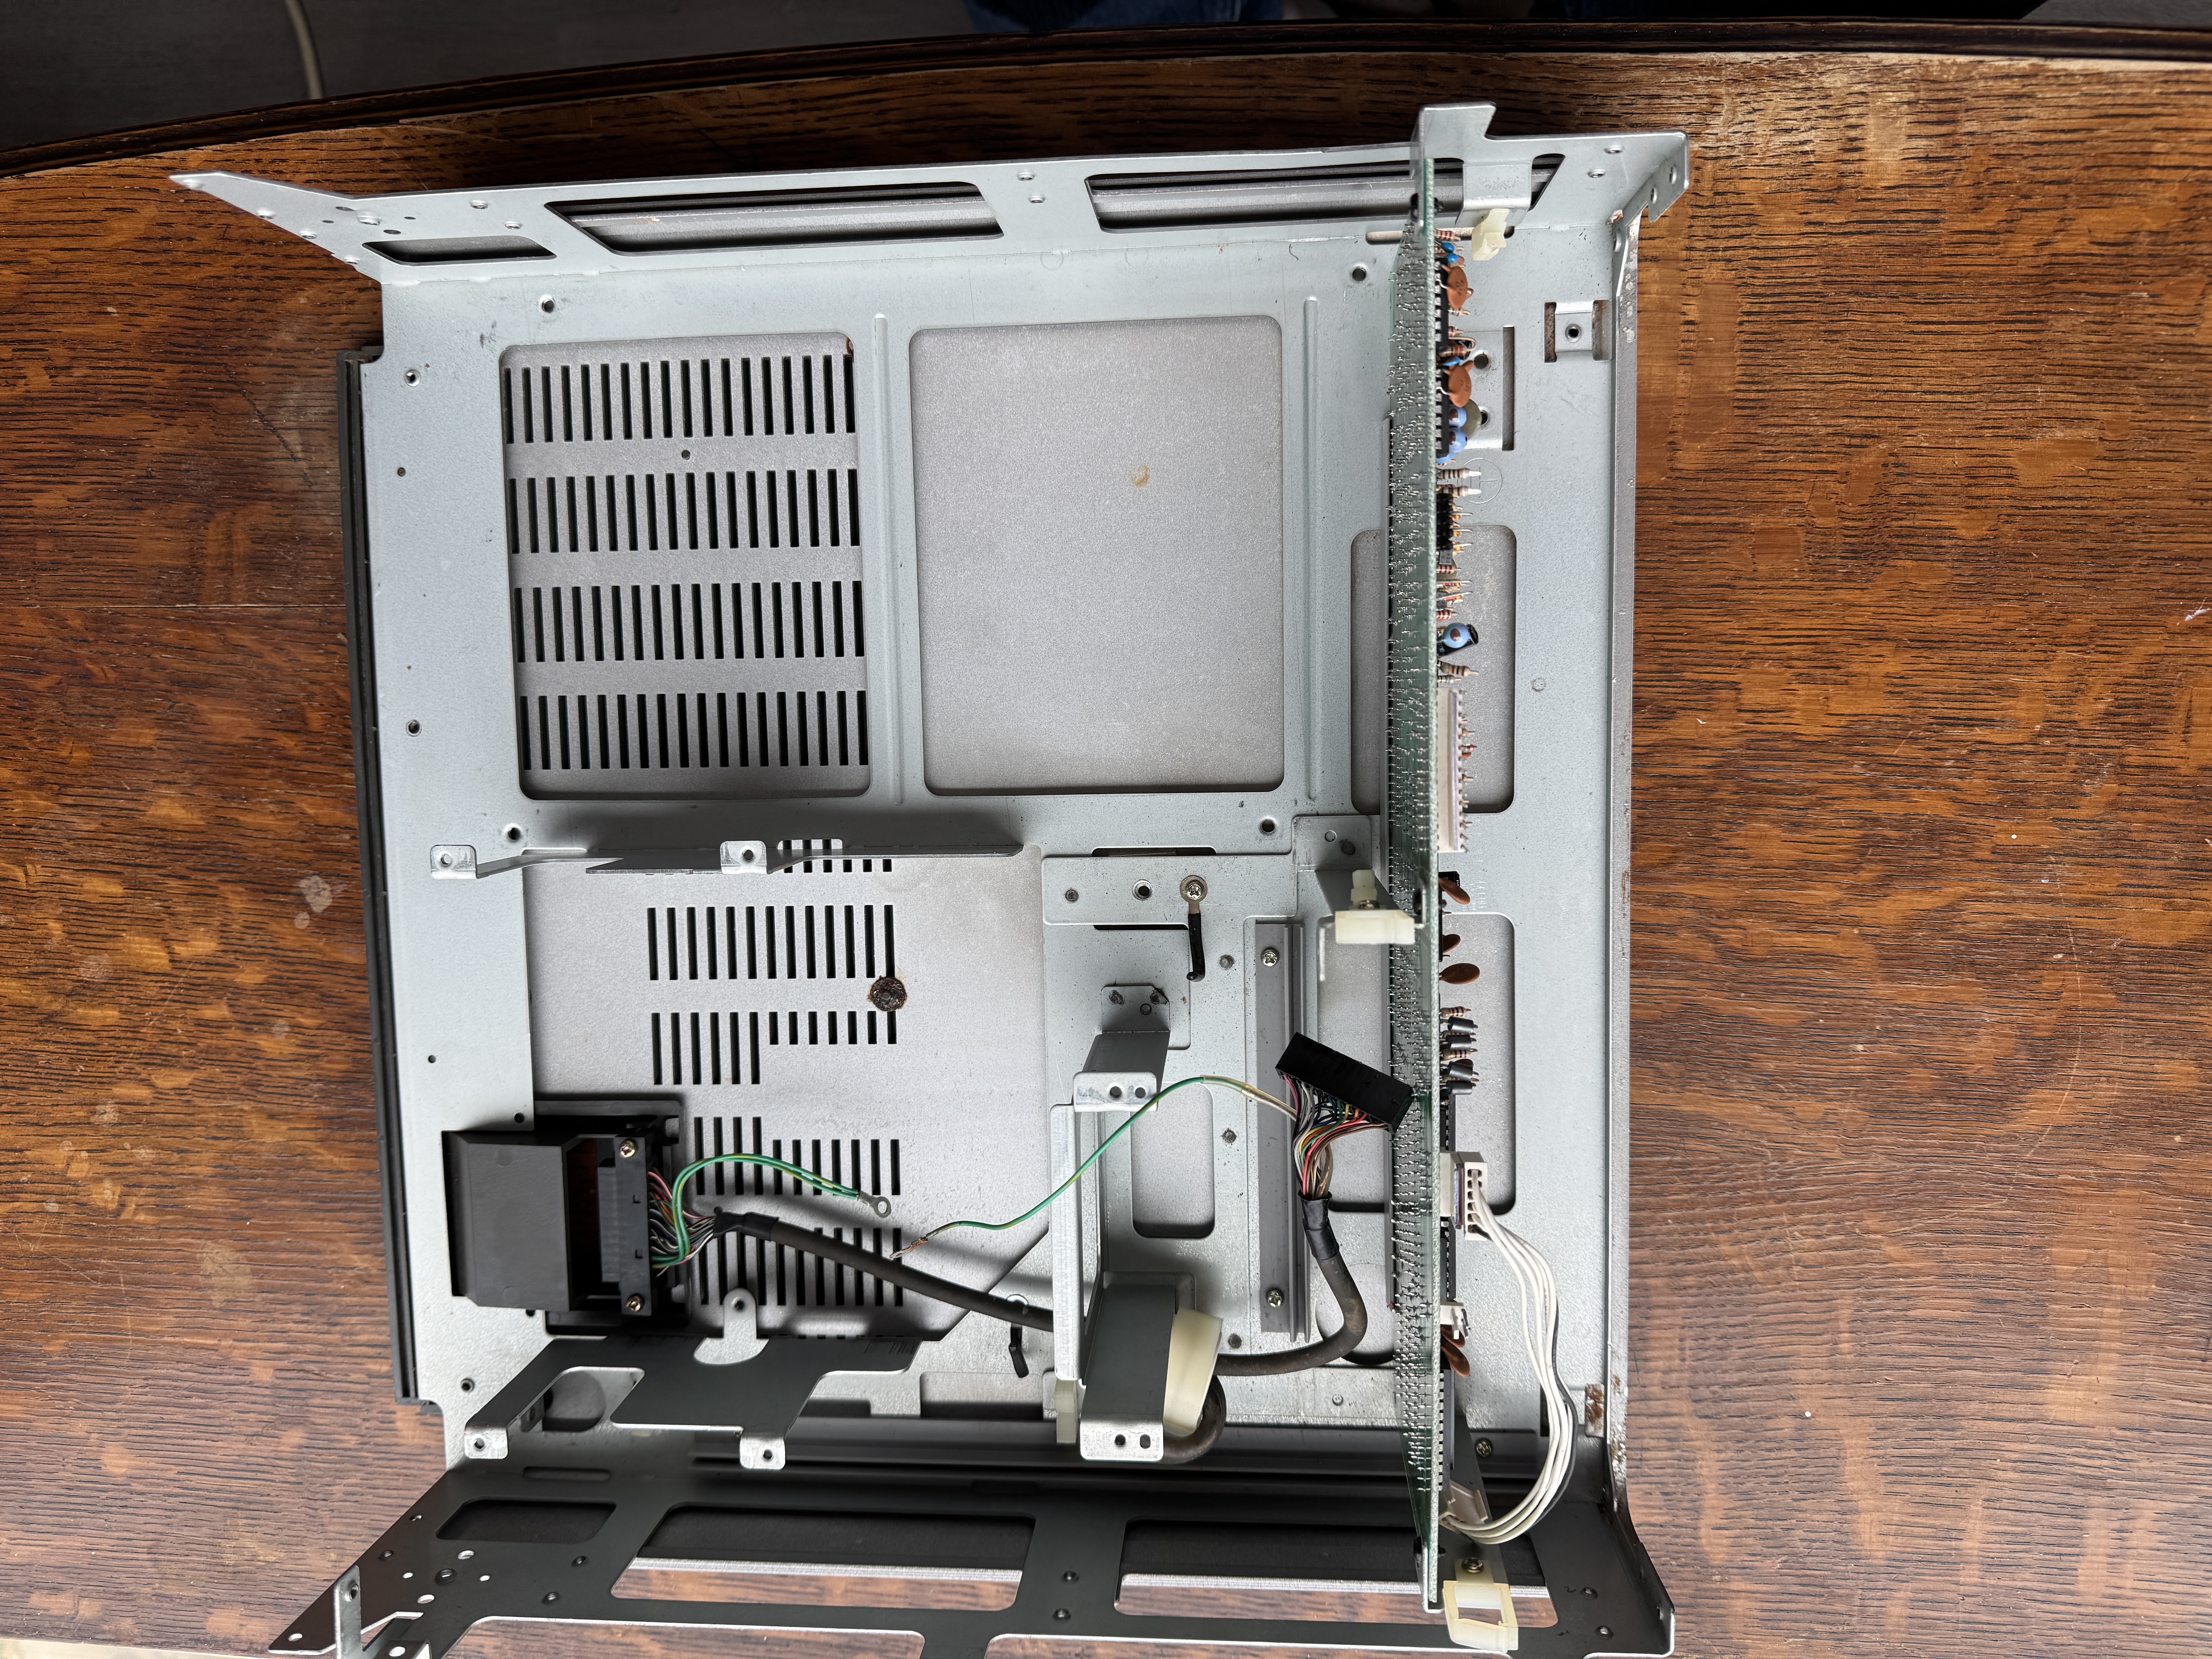
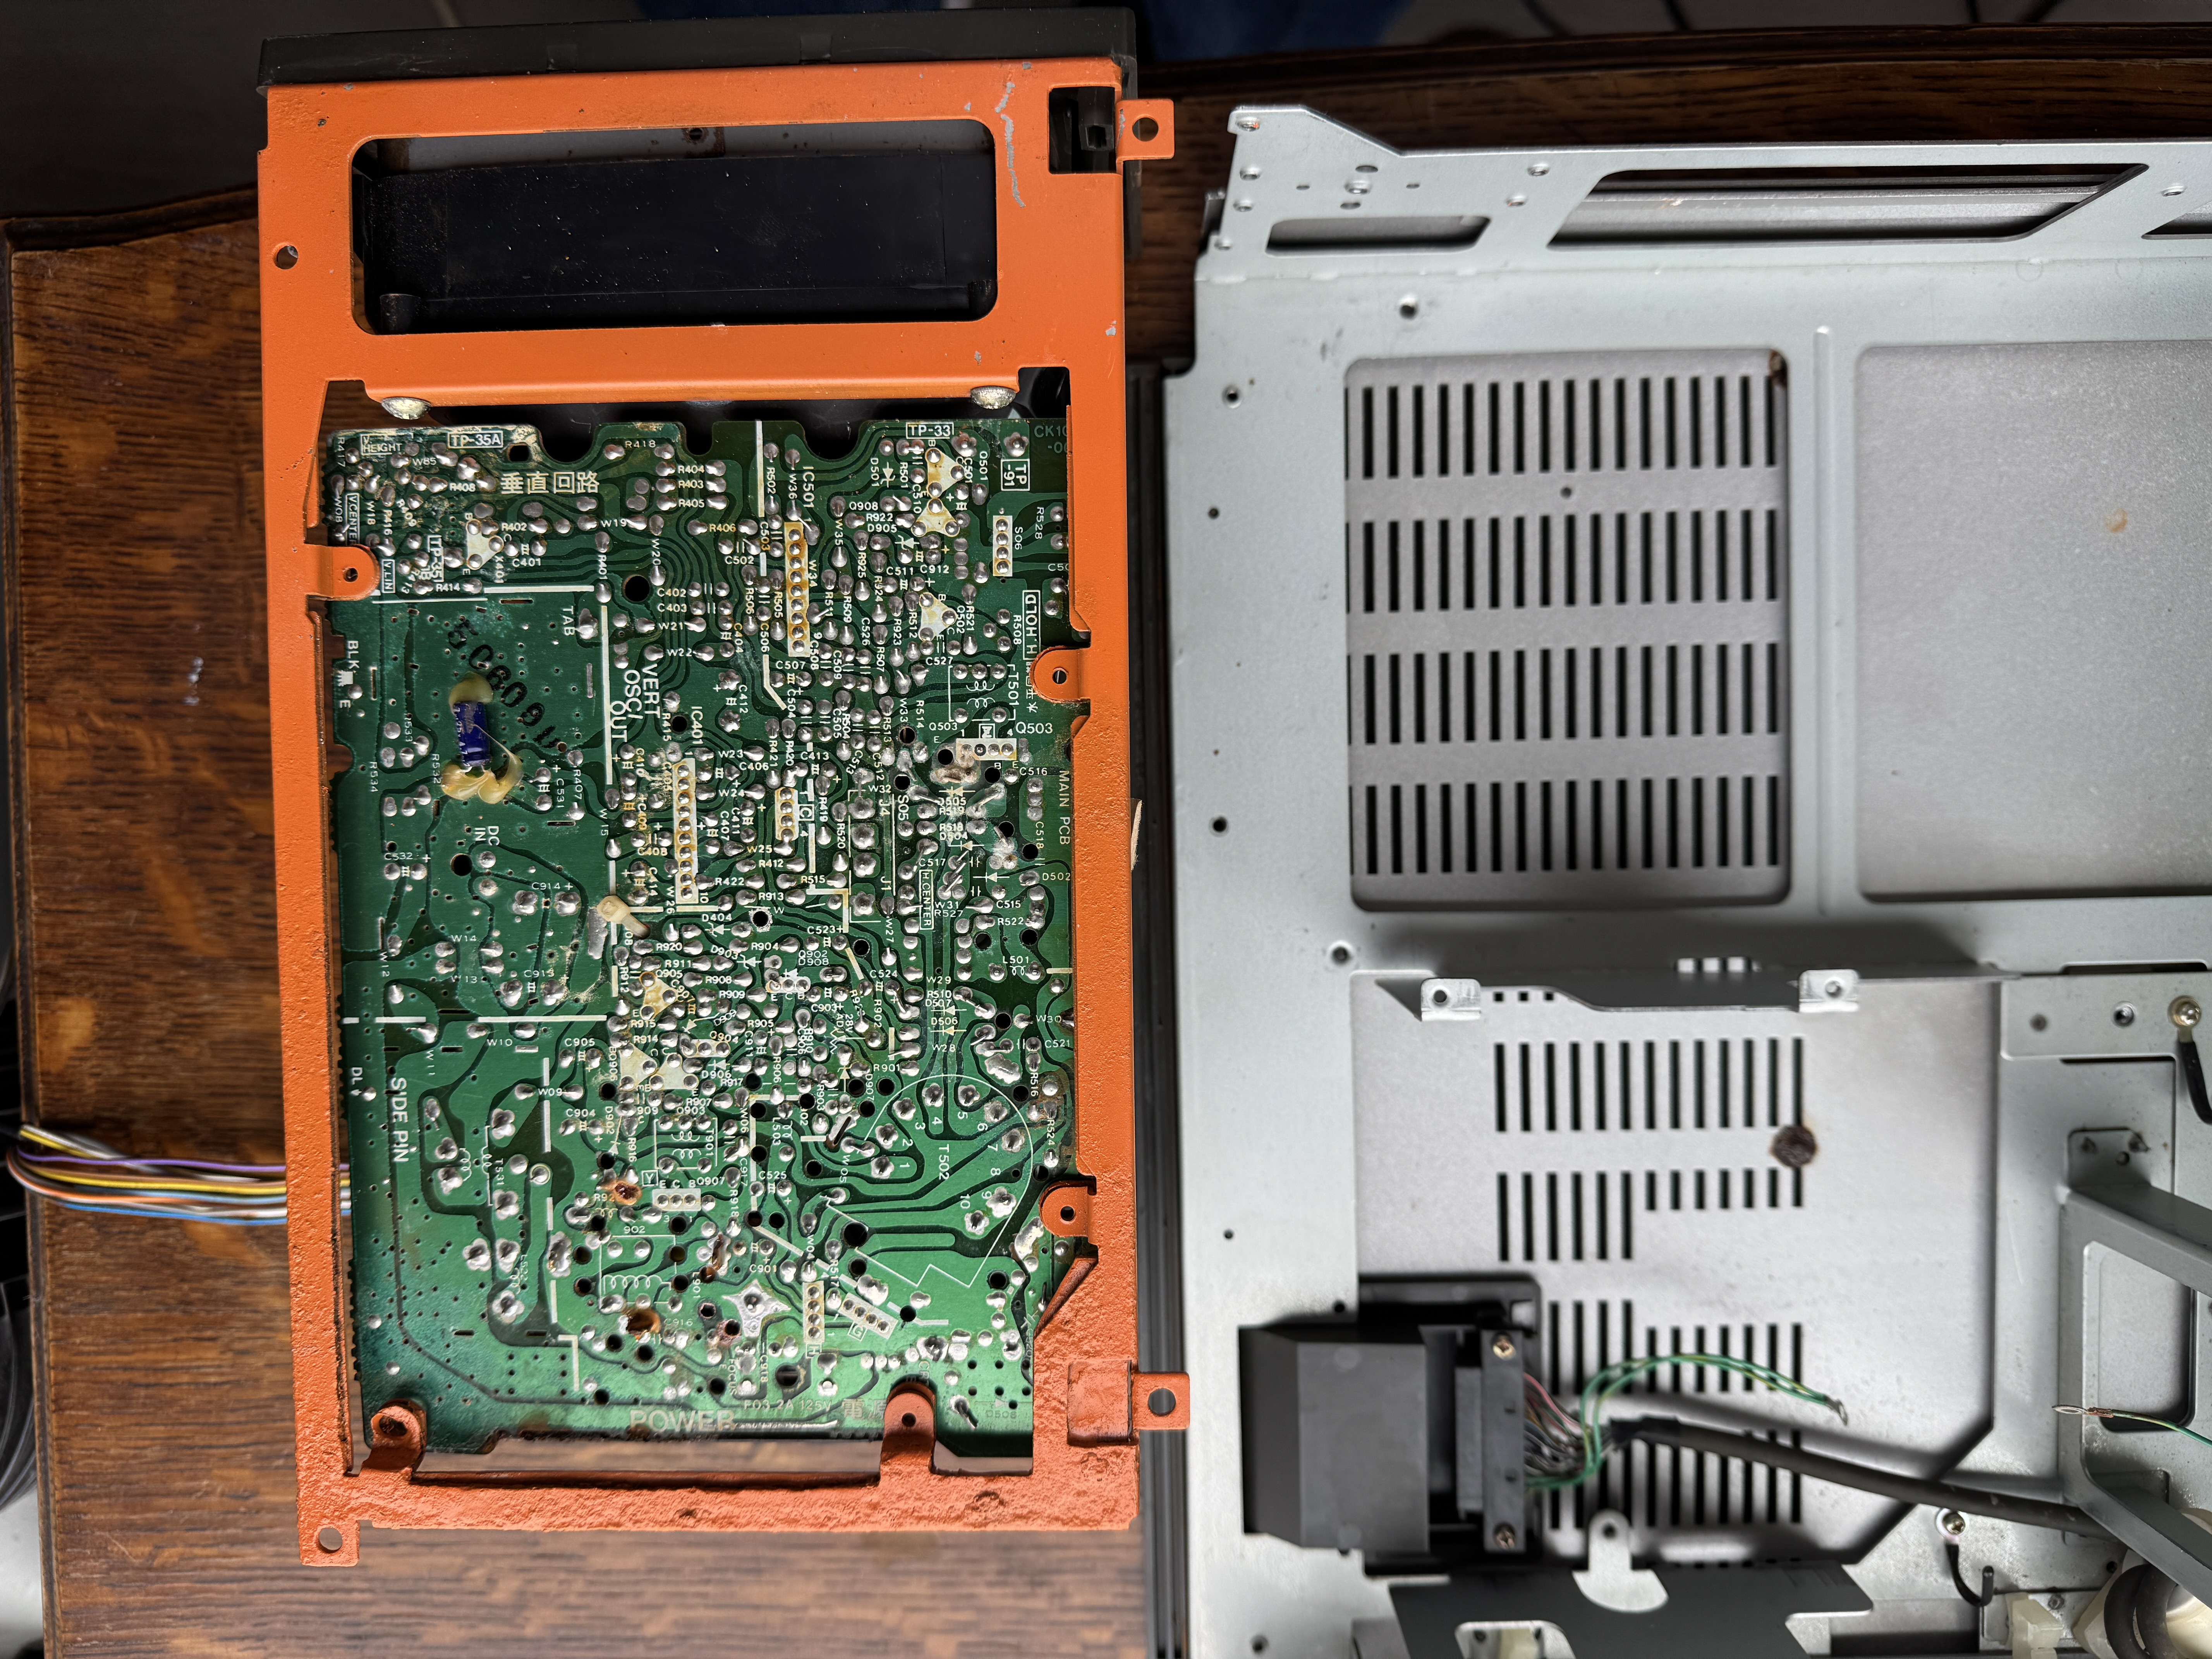
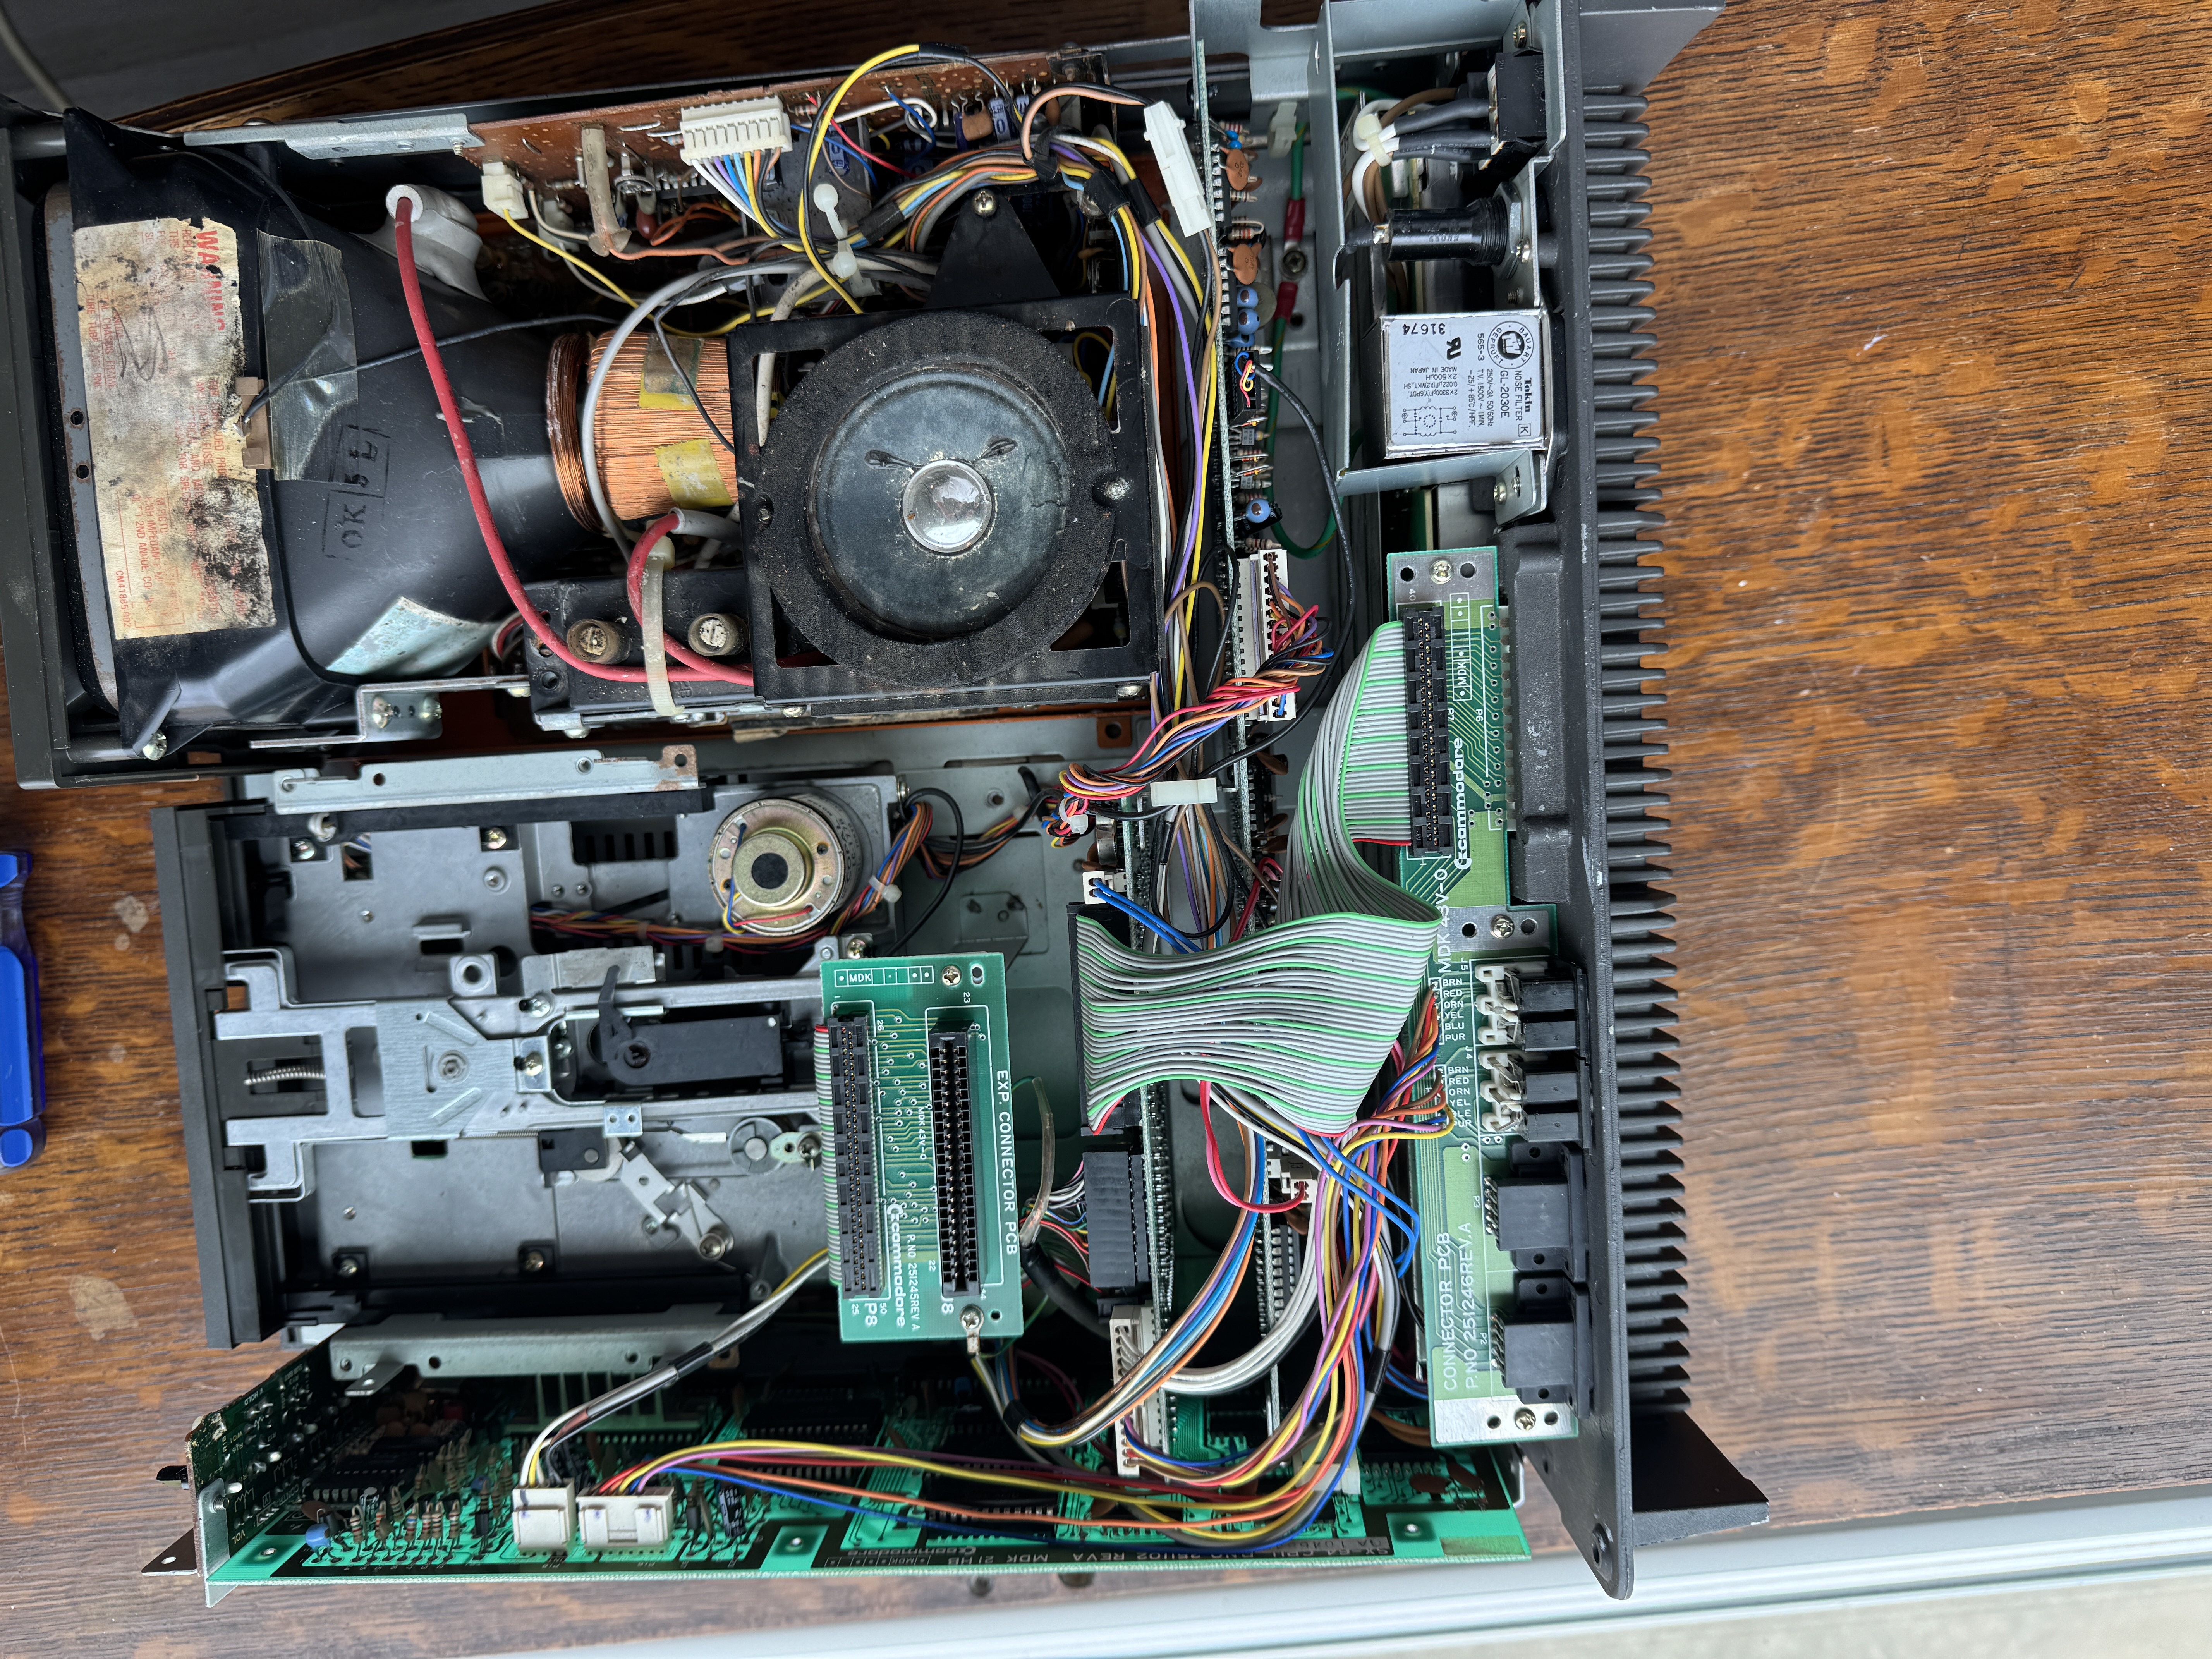
Once home, I cracked it open and the story changed instantly. All that rattling was rust flakes from the inside. The internal chassis was almost completely rotted away, screws were hopelessly fused to the frame, boards carried deposits and corrosion, and metal shields were badly eaten away. What looked like a slightly dirty portable at the show turned out to be what appeared to be a salt‑water survivor in far worse condition than I imagined.
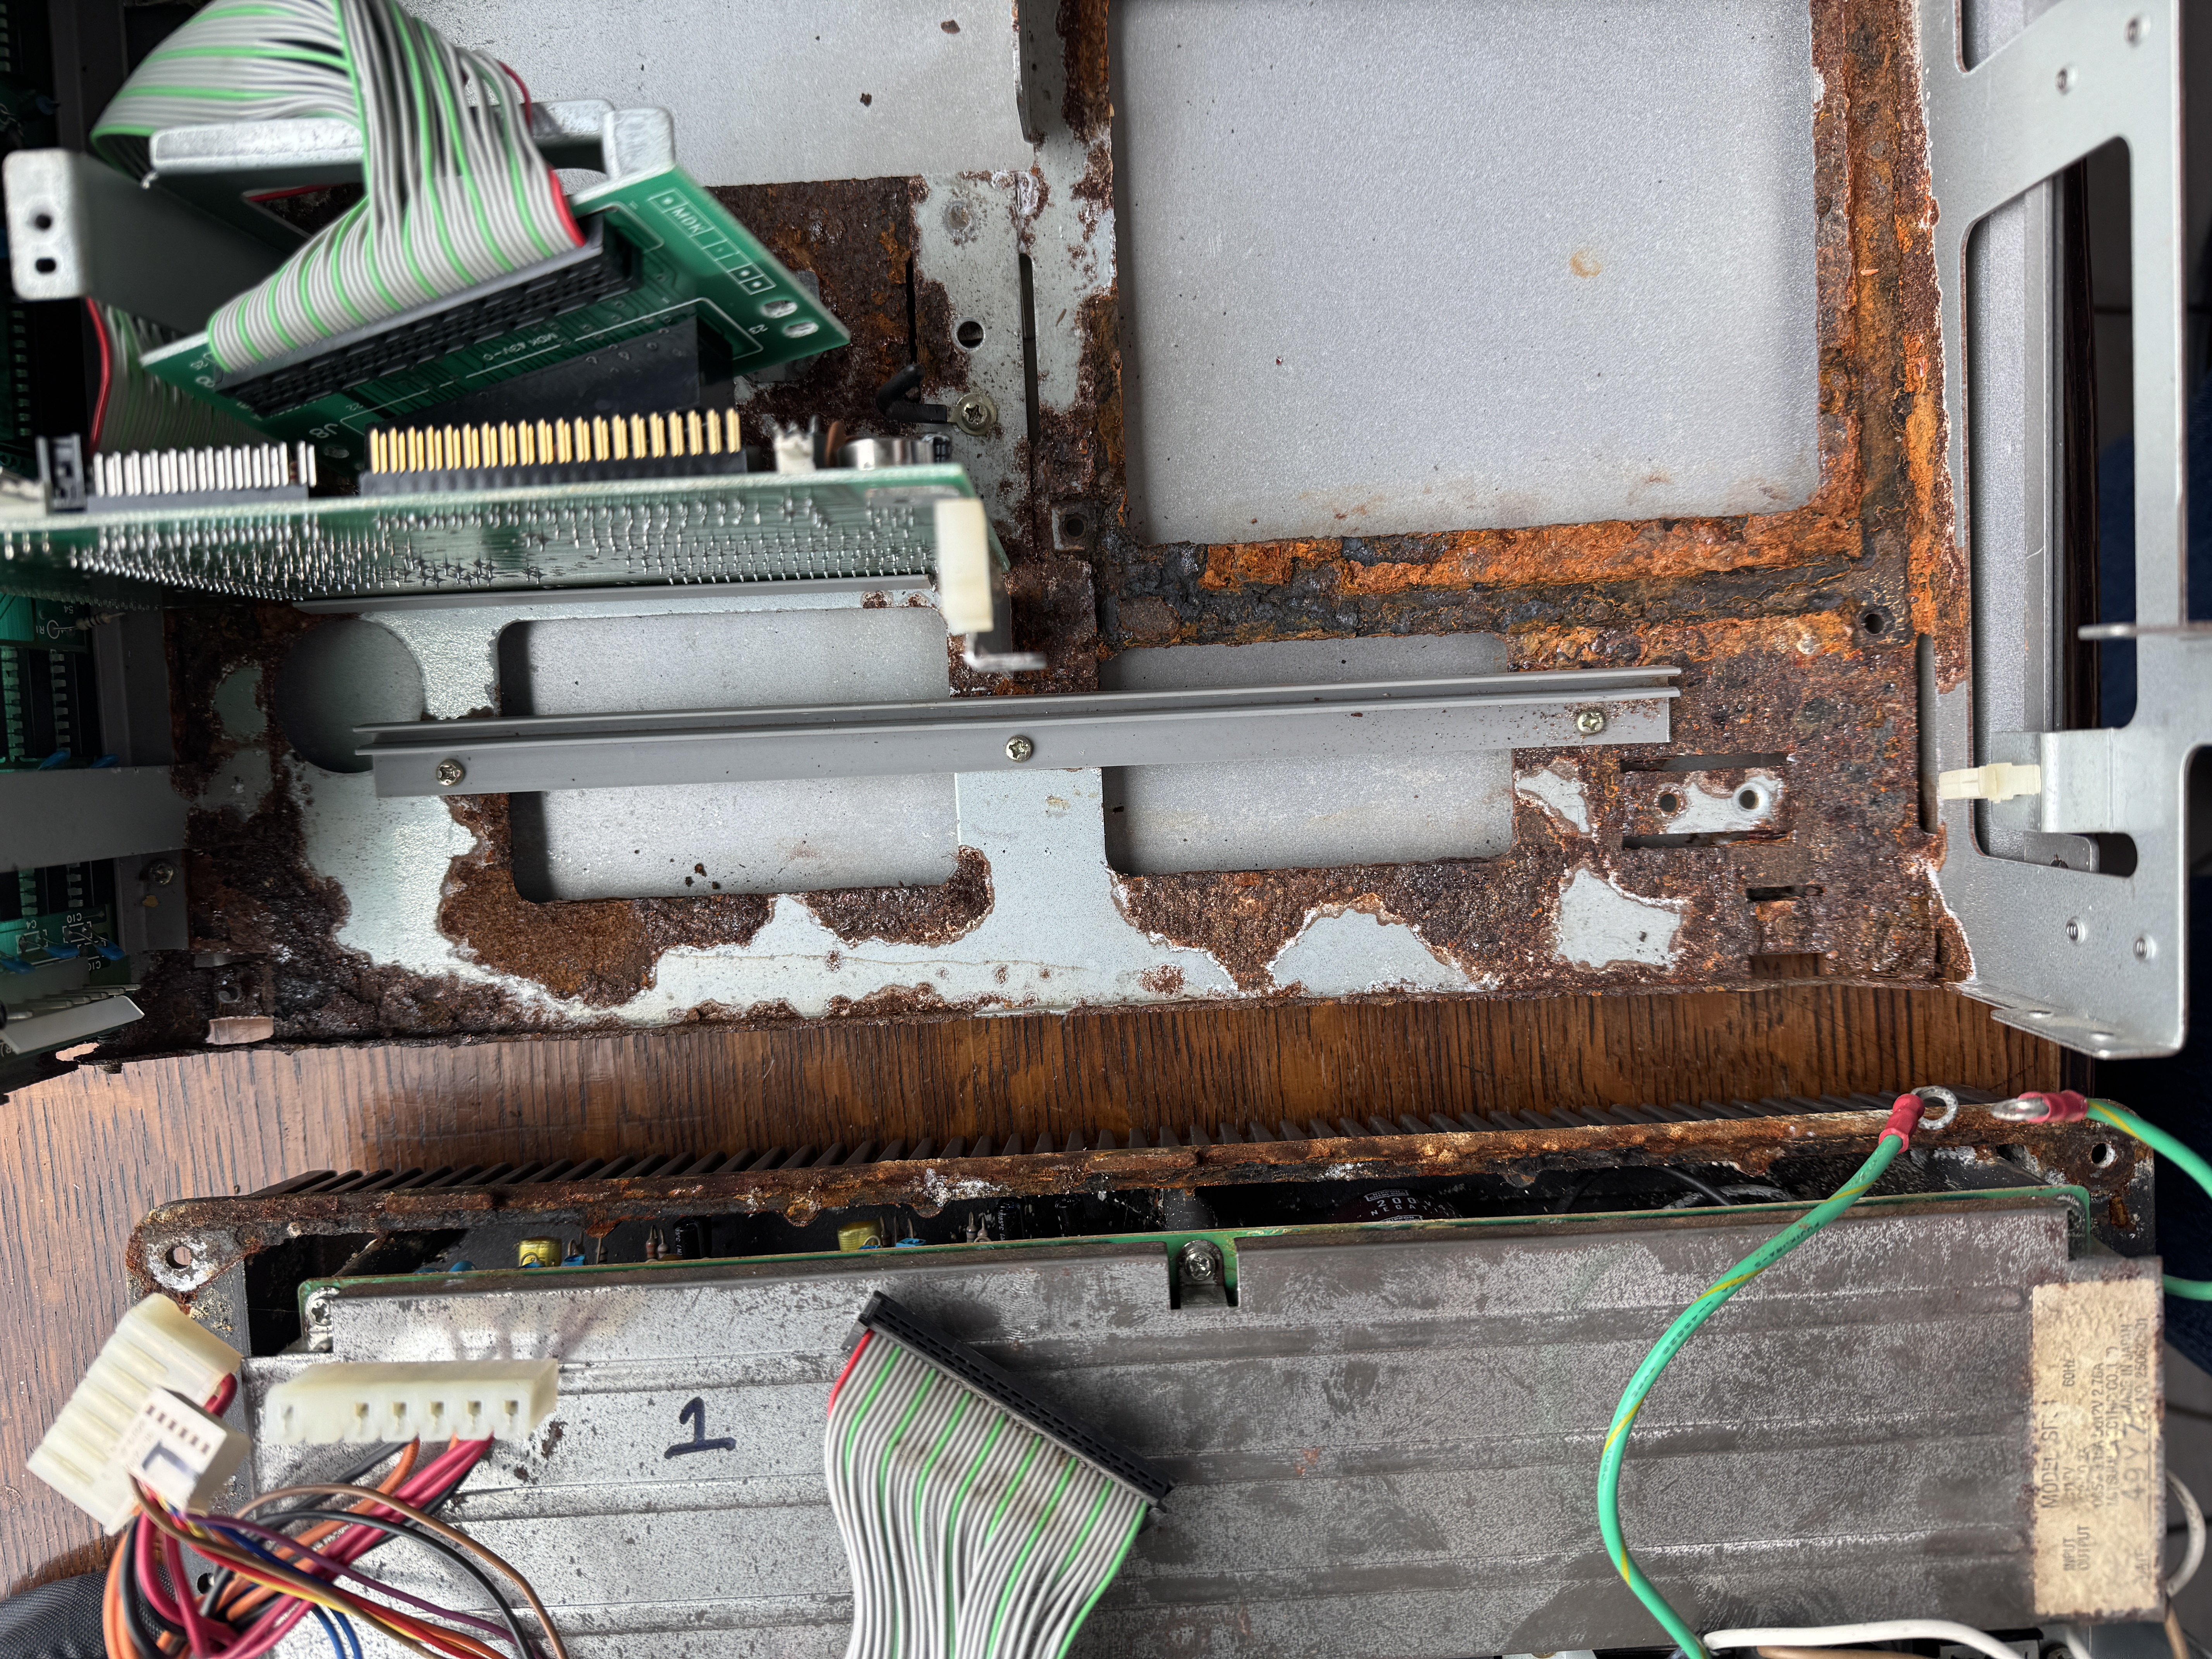

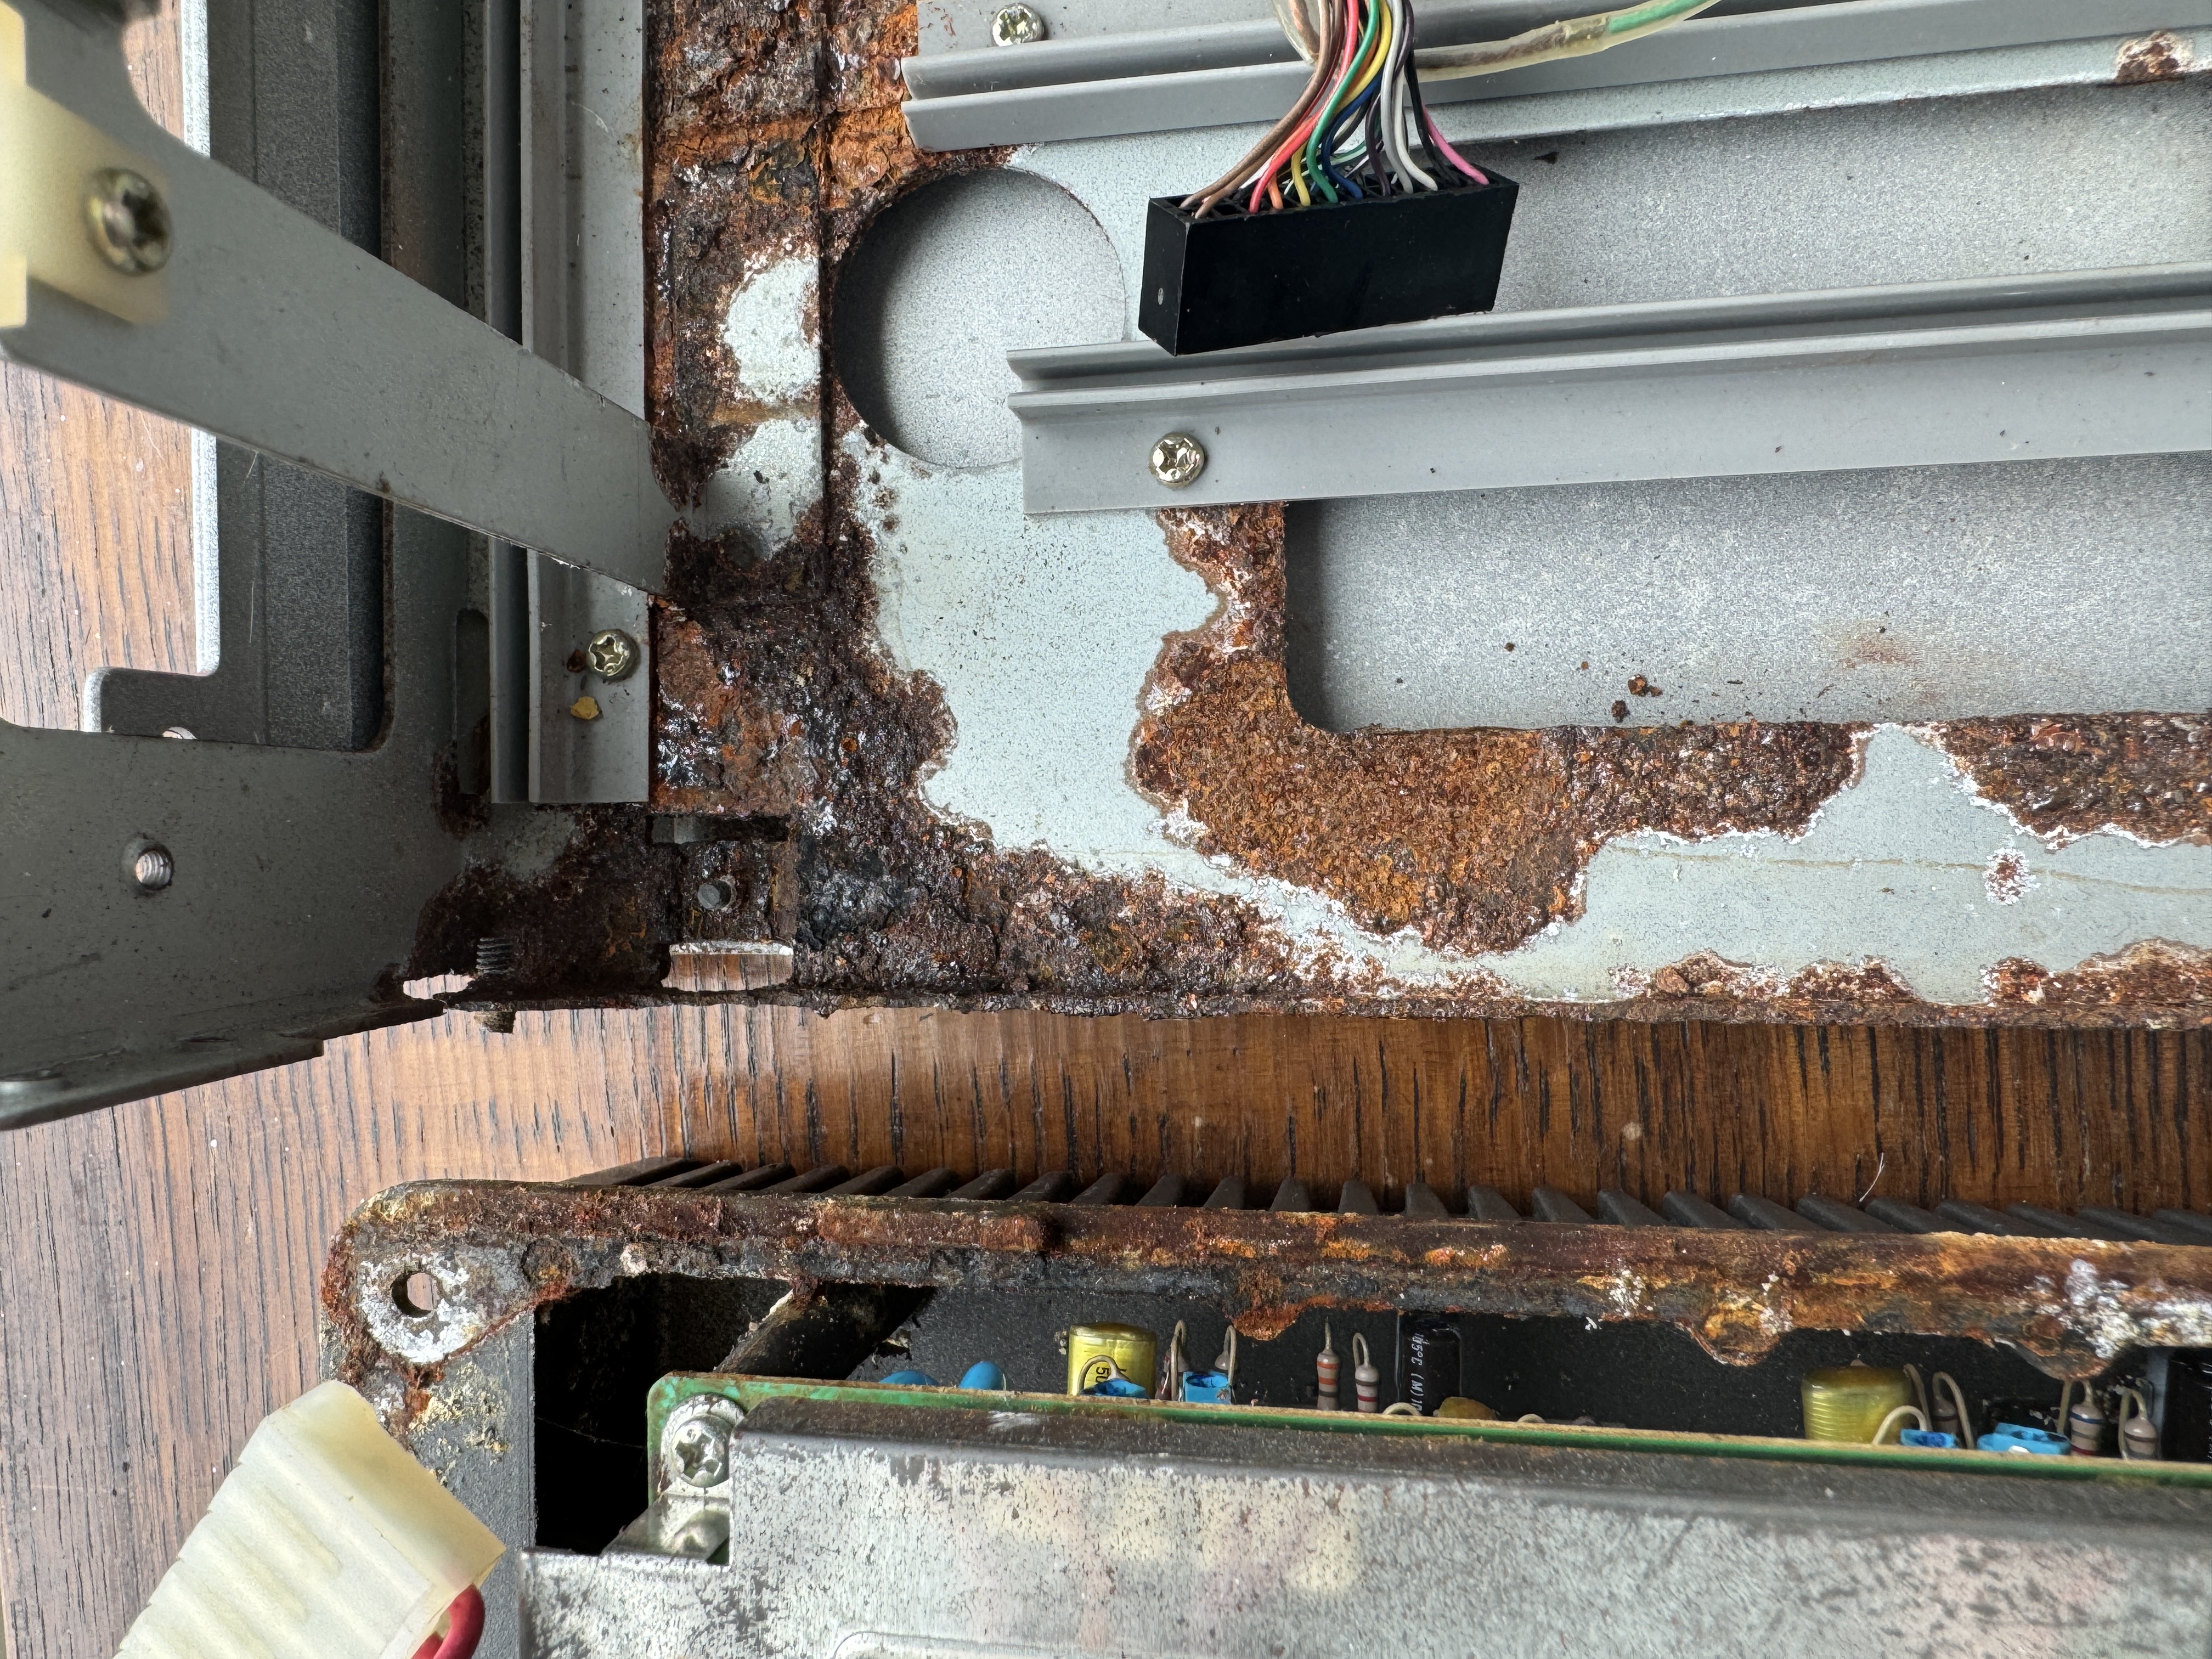
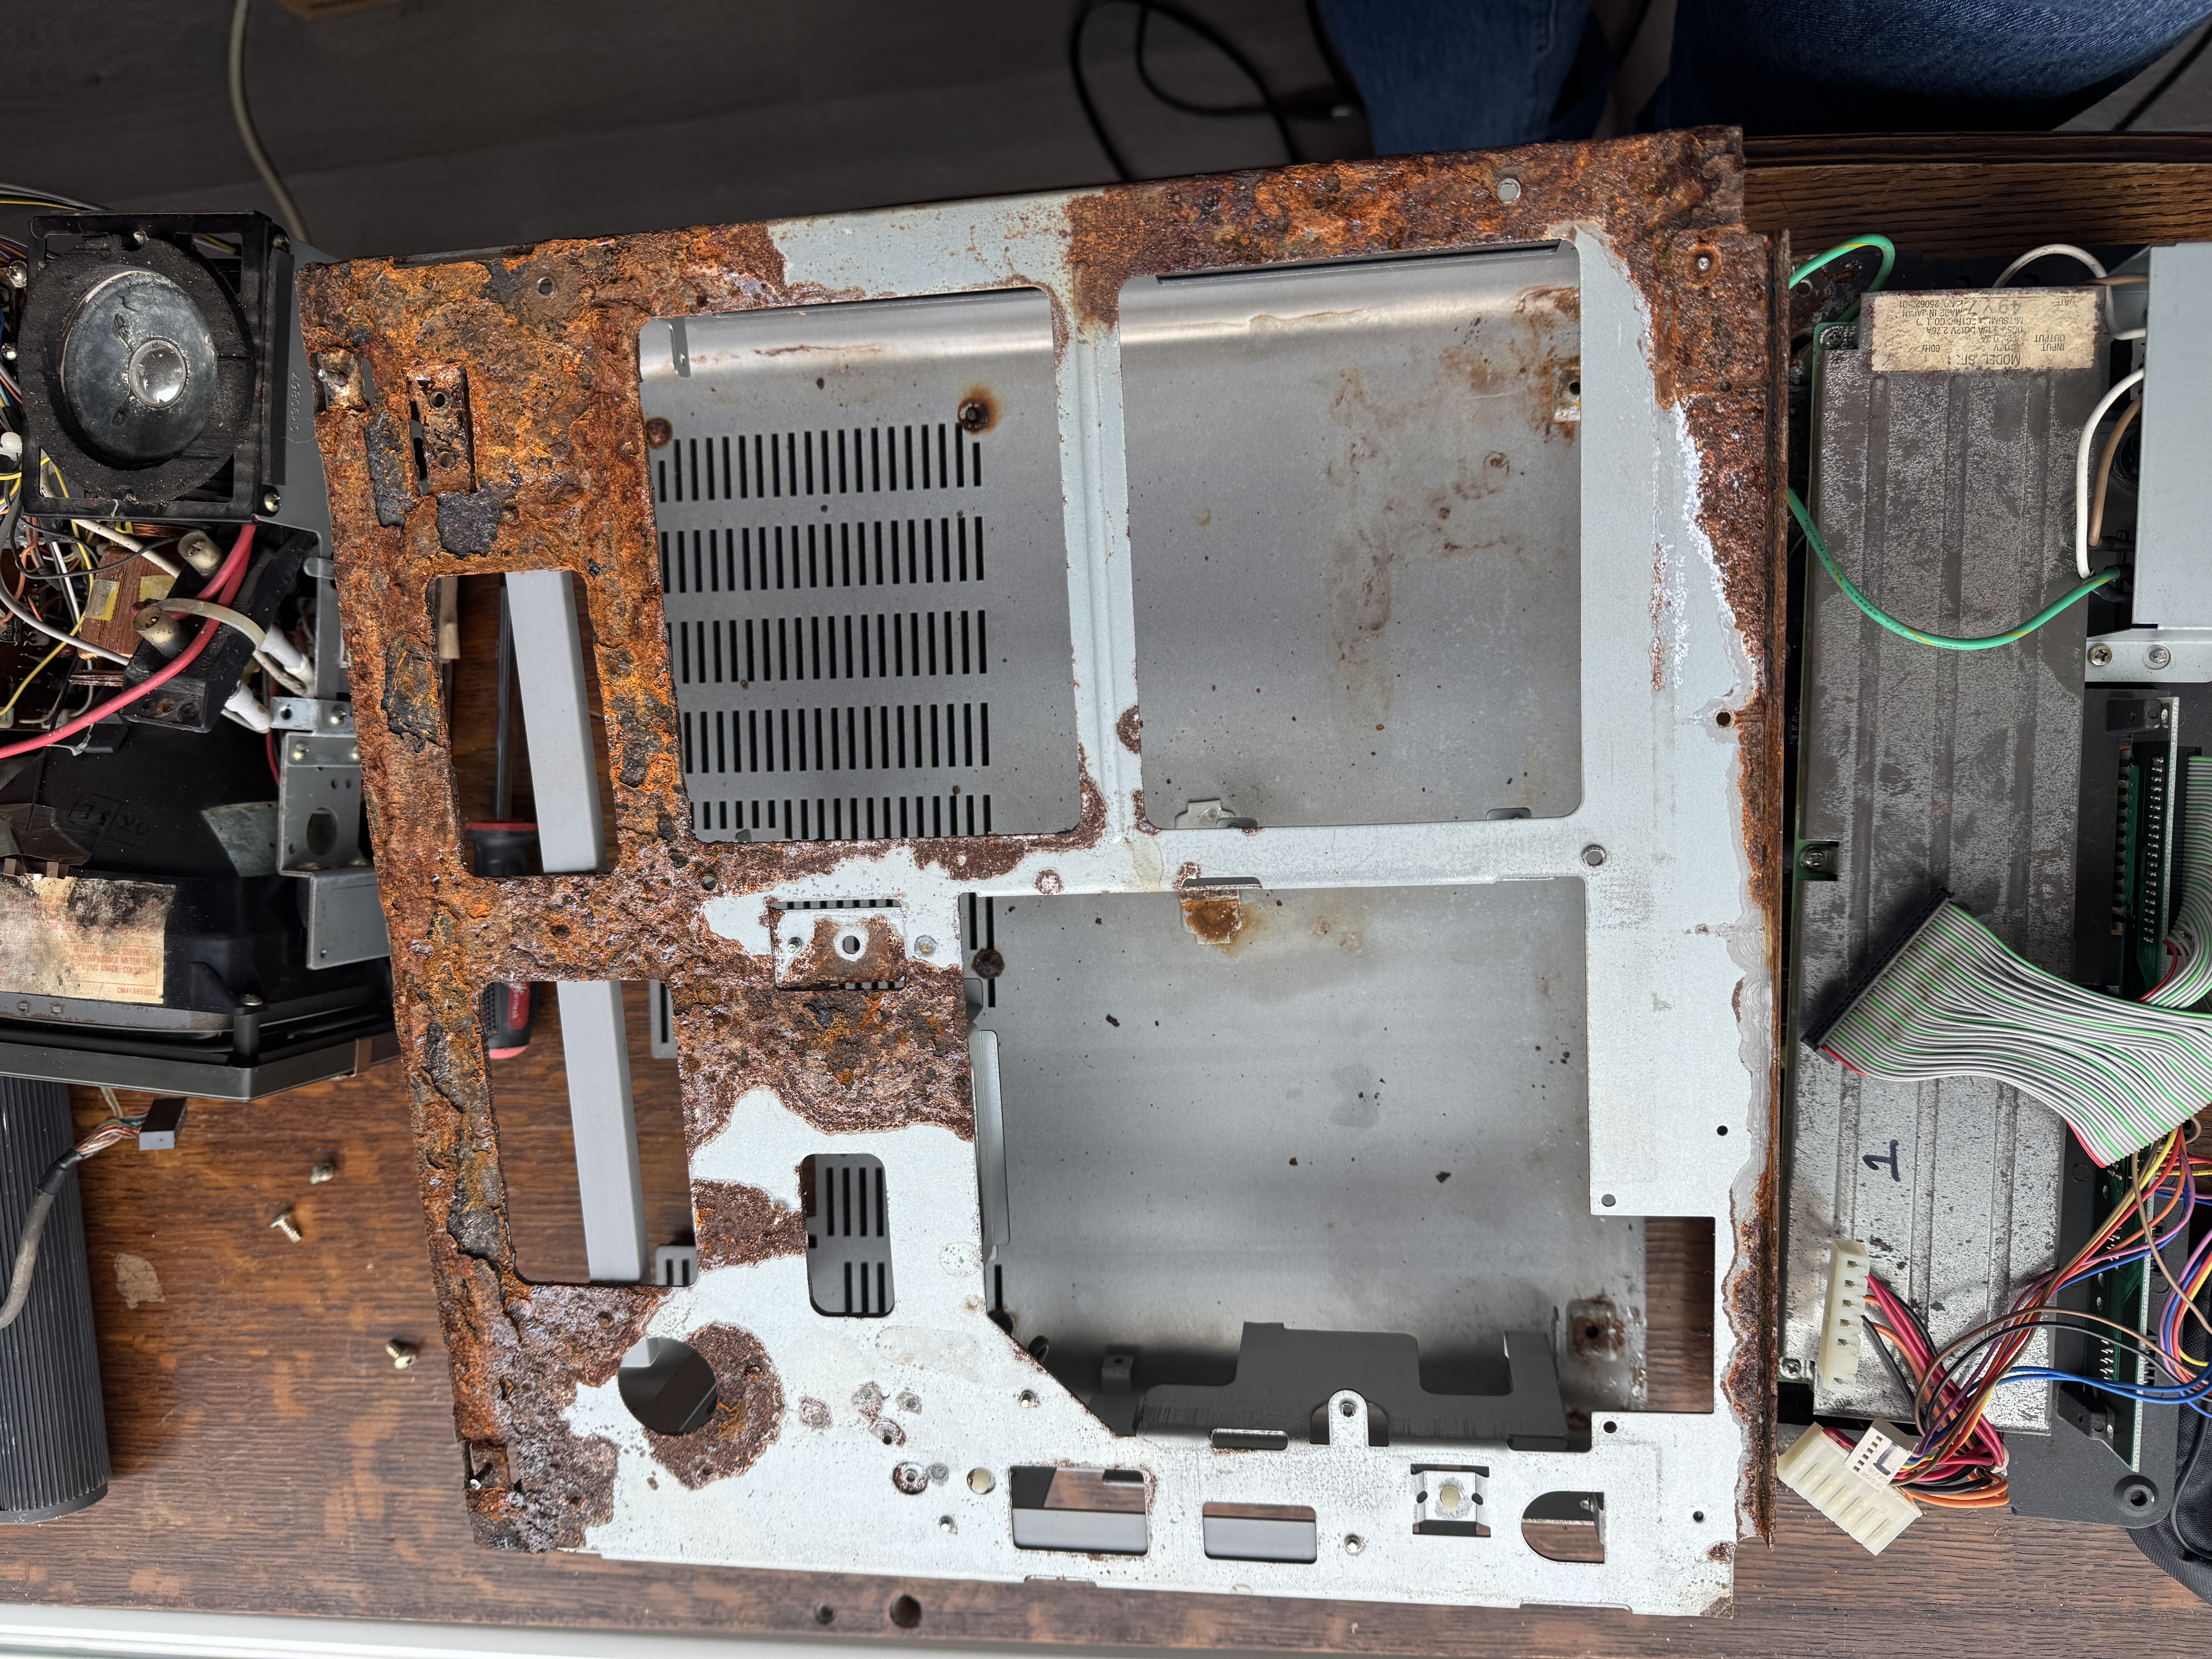
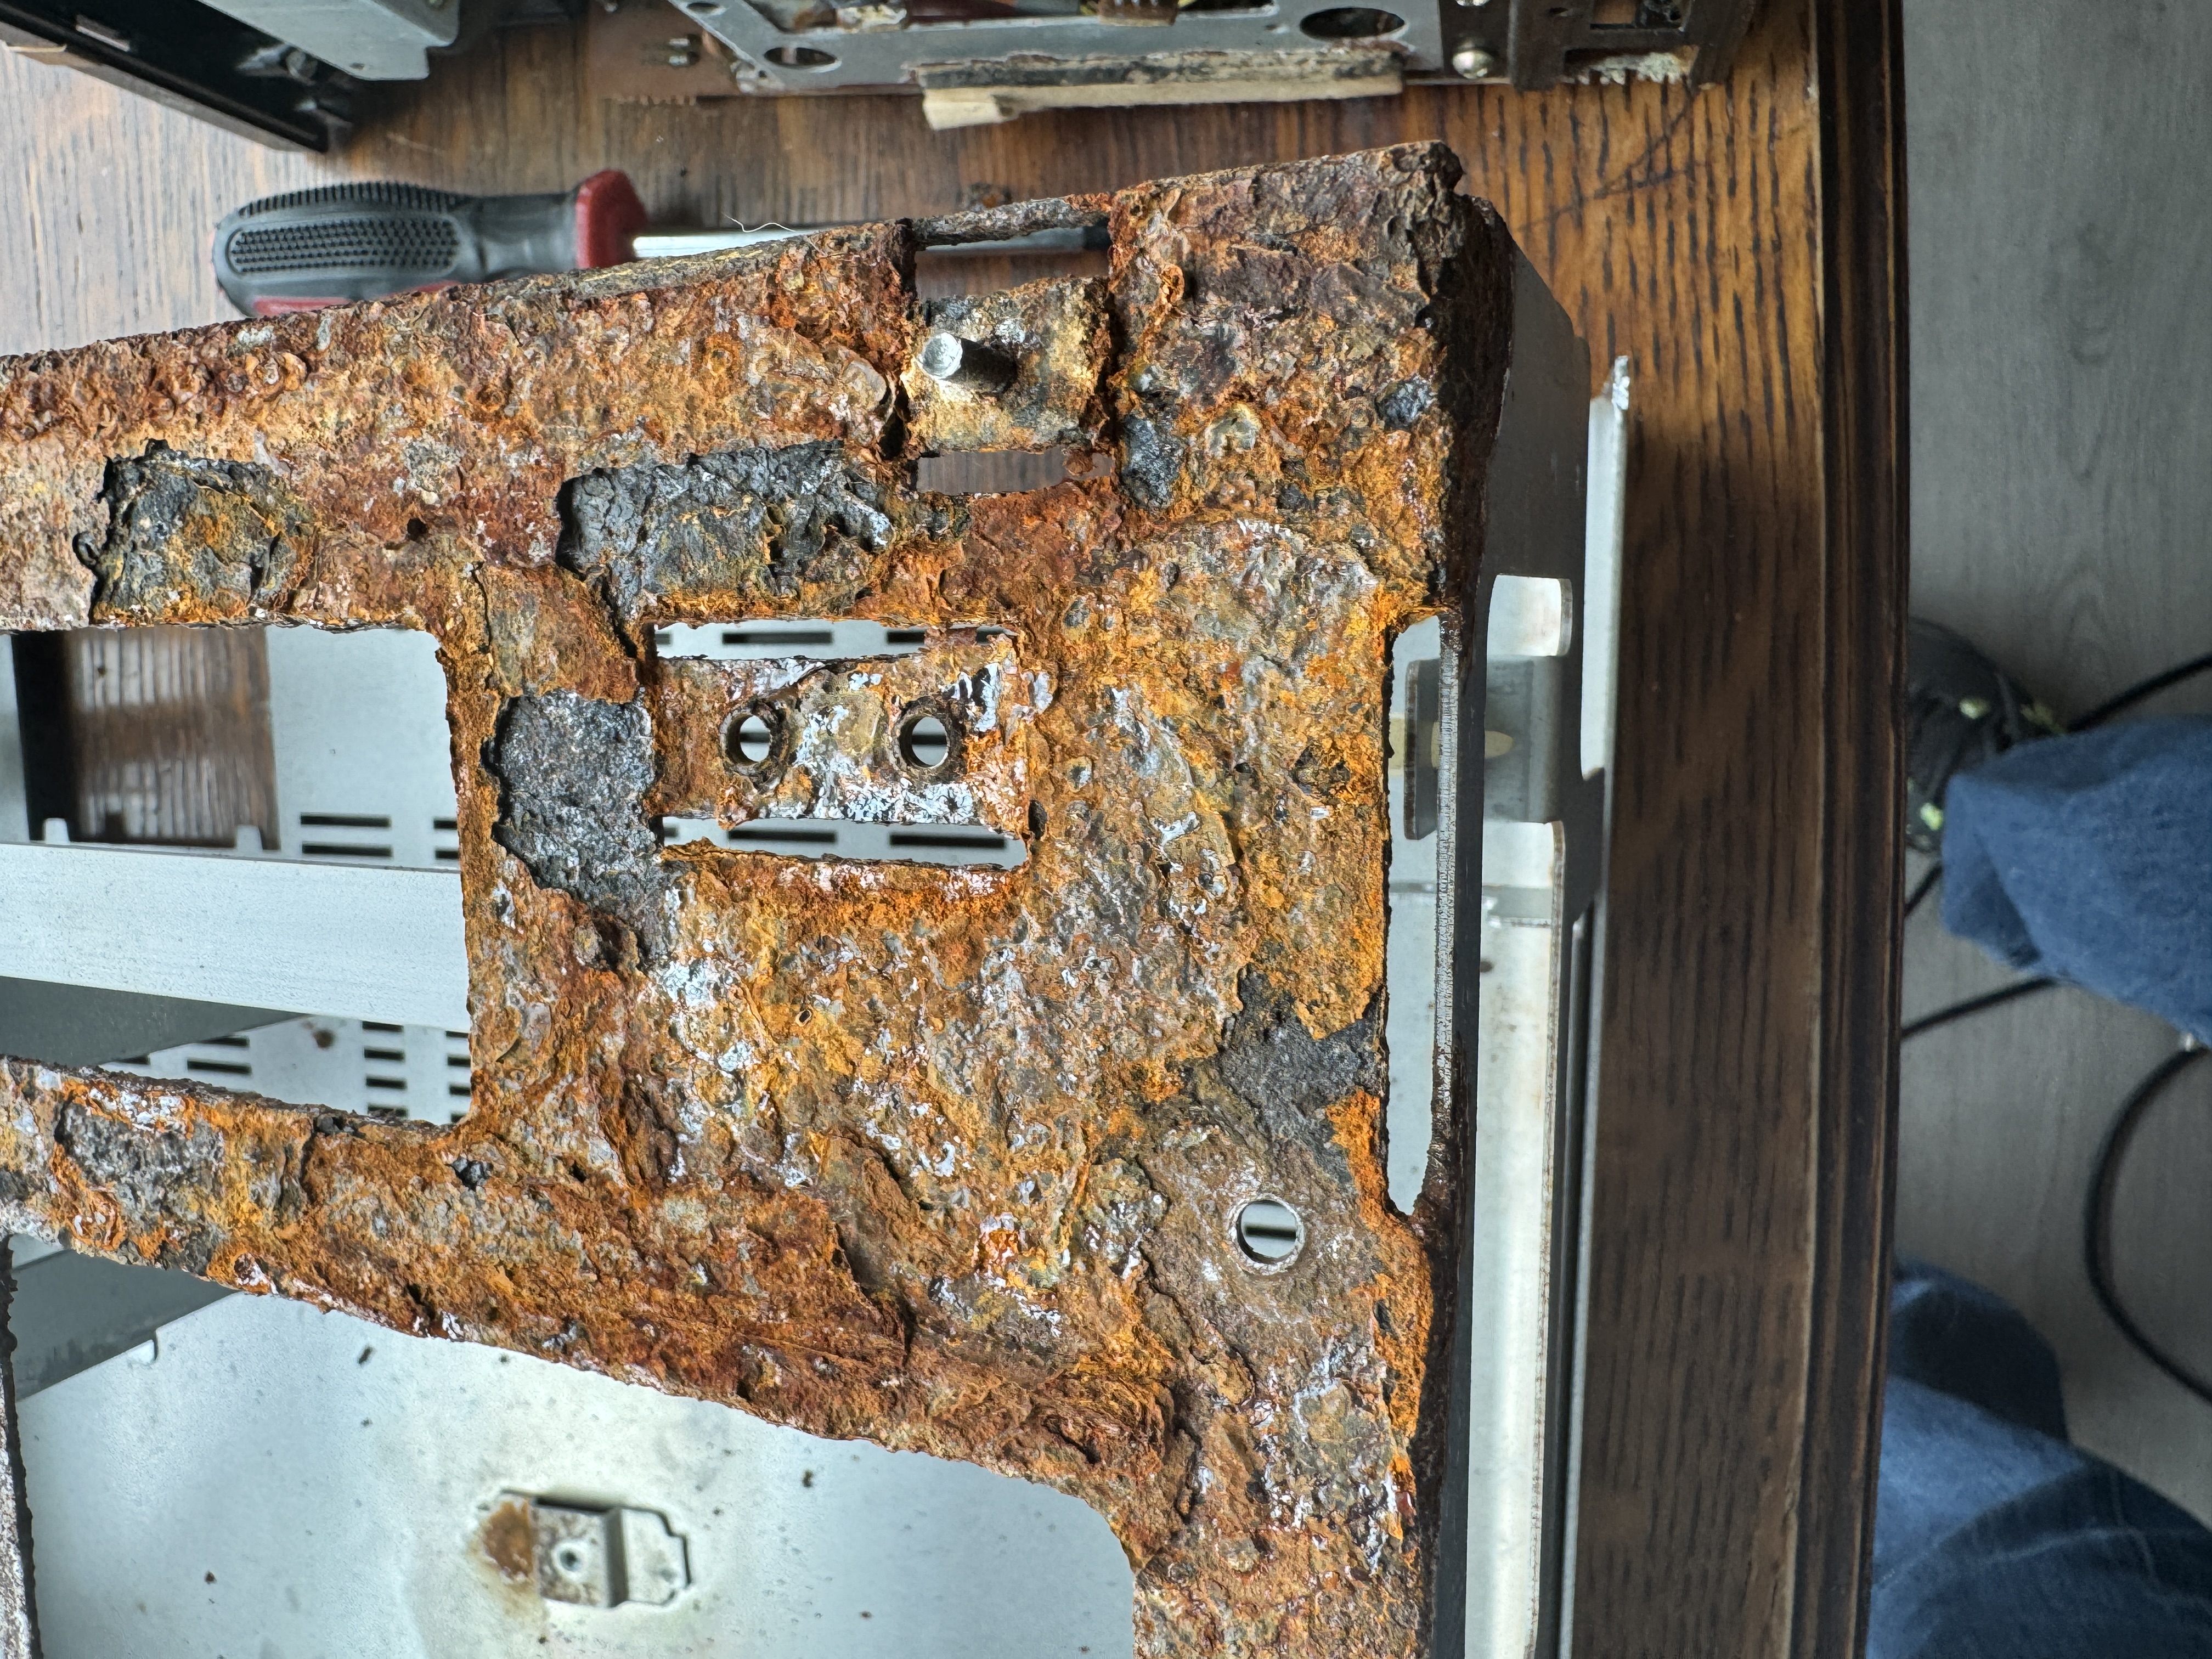
Teardown: drilling, soaking, freeing the fused screws.
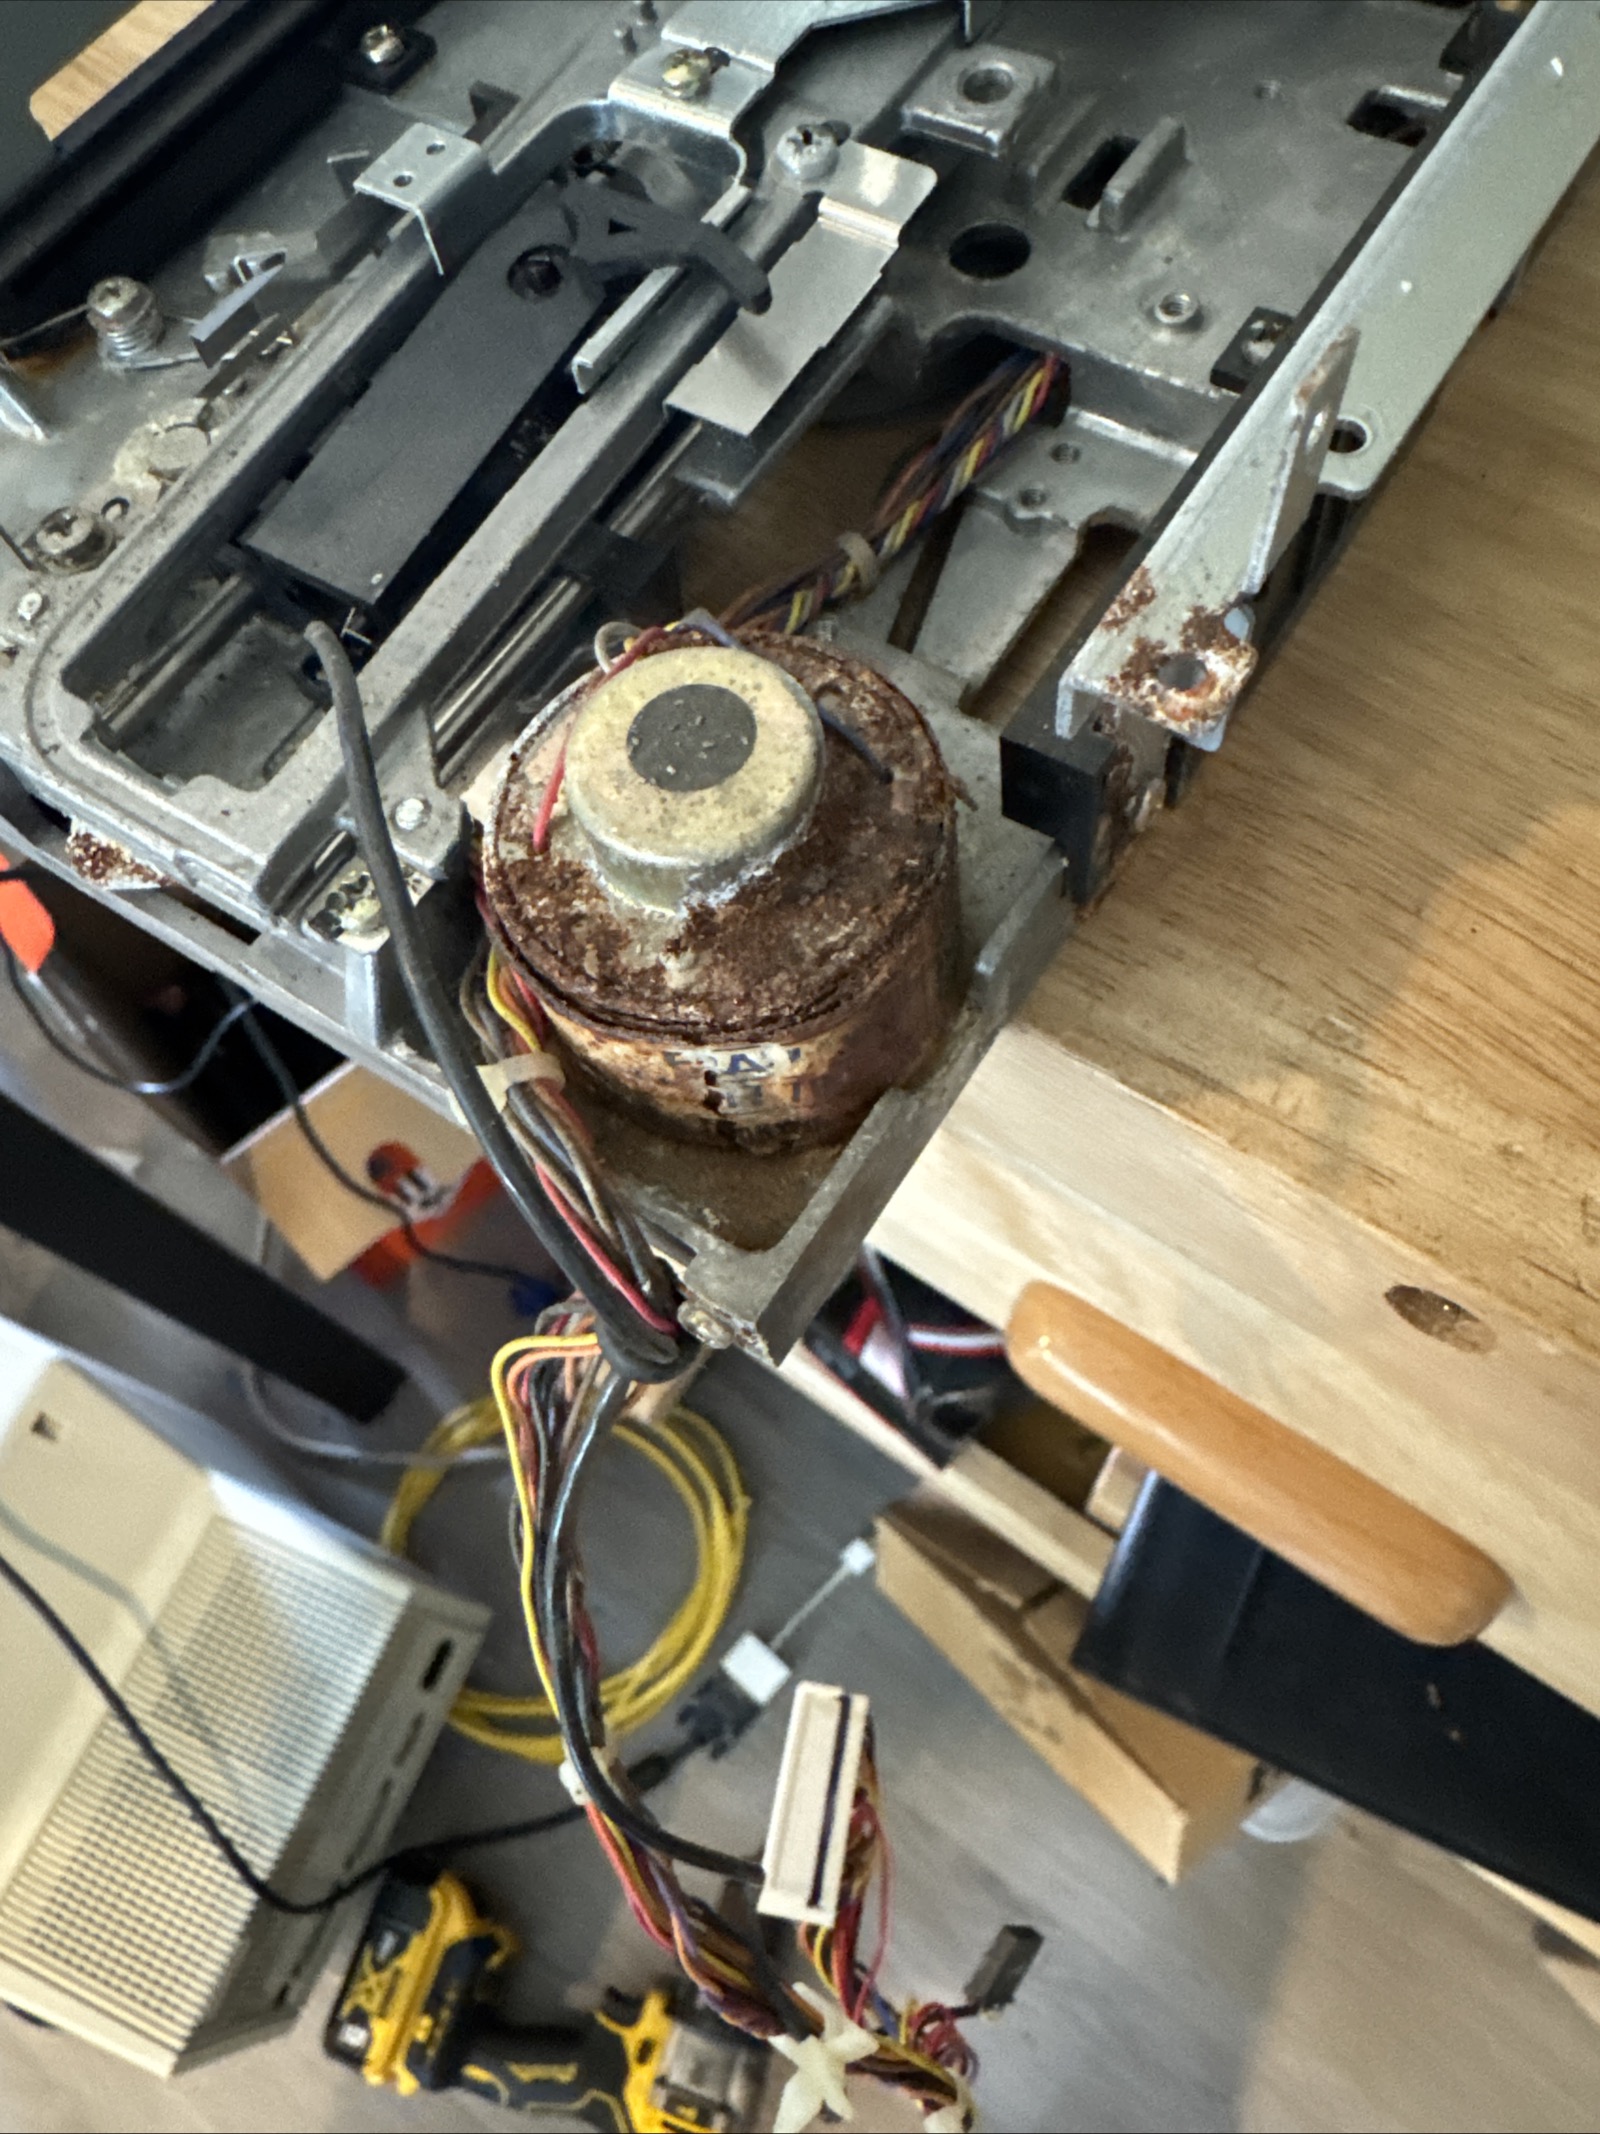
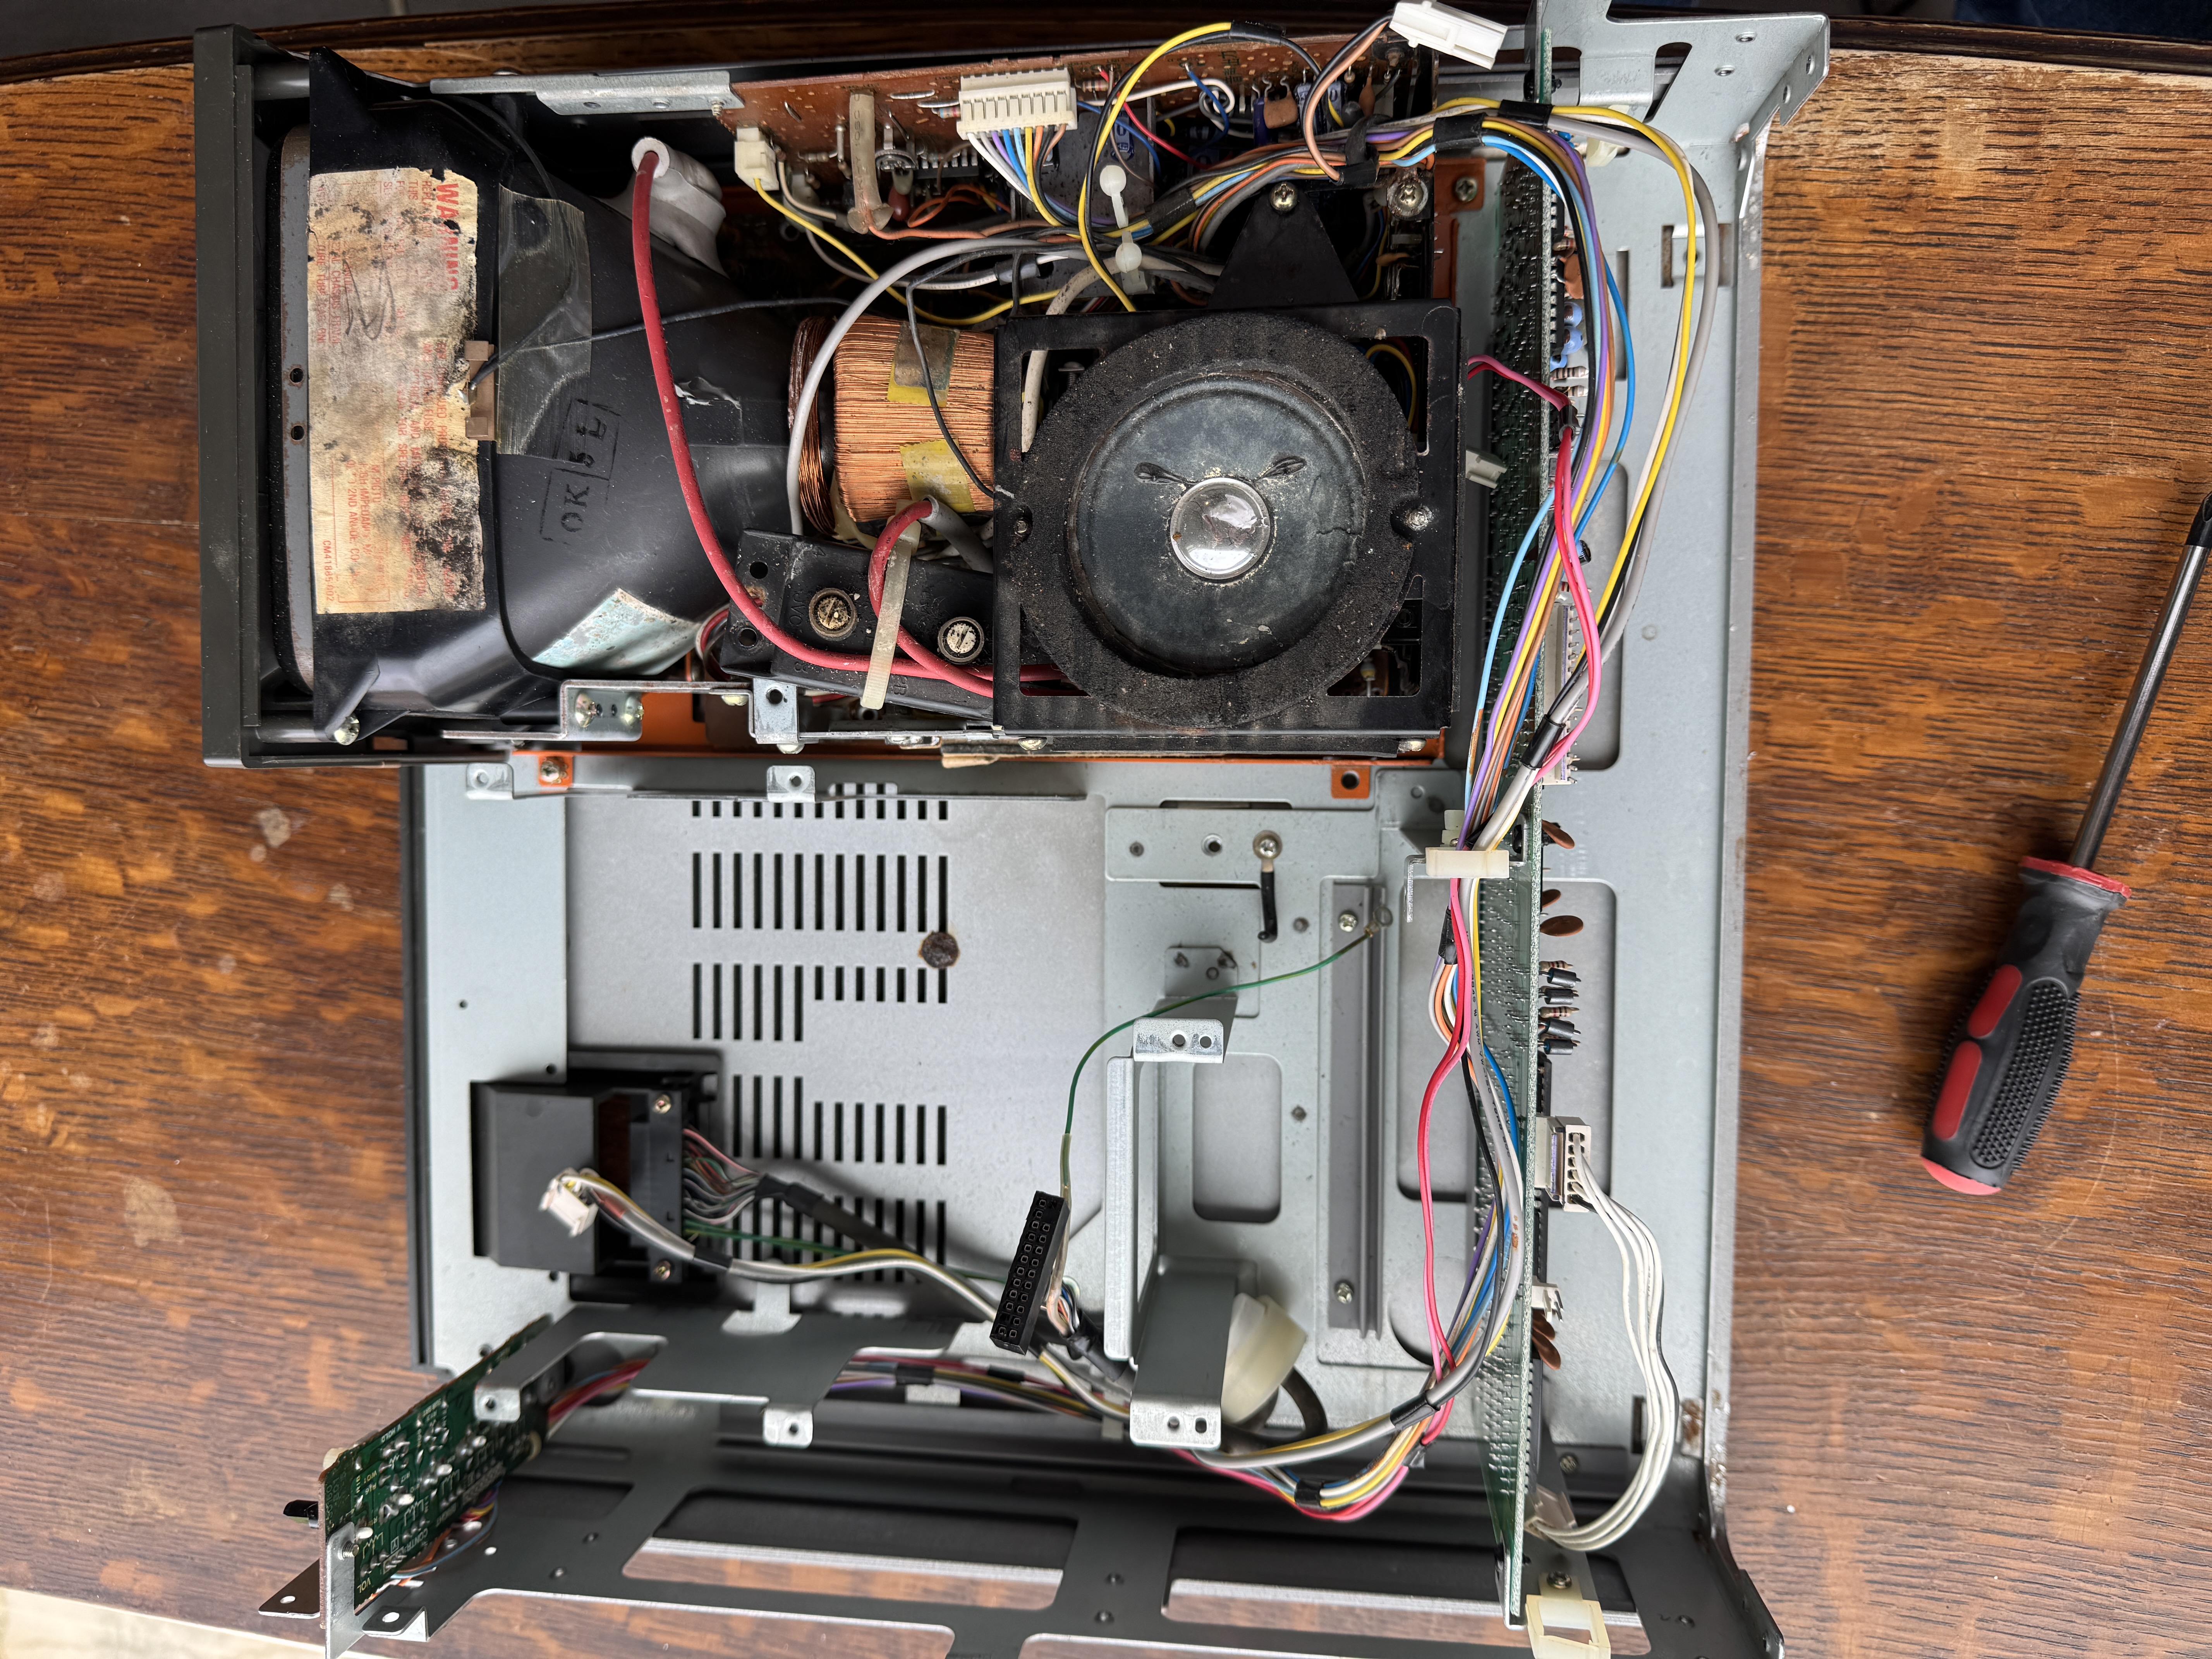
The only way forward was mechanical. I carefully drilled out several seized screws, starting small and stepping up, keeping chips clear of the boards. Brackets and shields went into rust‑removal baths where possible. In some instances, replacement was the only option, so off to eBay looking for someone selling parts. Fortunately, I found a seller parting out some boards, so I emailed asking if he had any metal parts. Quick negotiations and a replacement chassis was on it's way! Other metal parts required attention with wire brushes and rustoleum paint to keep the rust at bay!

Plastics got a different treatment: gentle cleaning, no harsh solvents. The keyboard switches were flushed, the keycaps soaked and brushed. The drive mechanism was disassembled and cleaned - but the drive motor was beyond help; anything that didn't respond to love was earmarked for replacement.

Electronics: what survived and what didn't
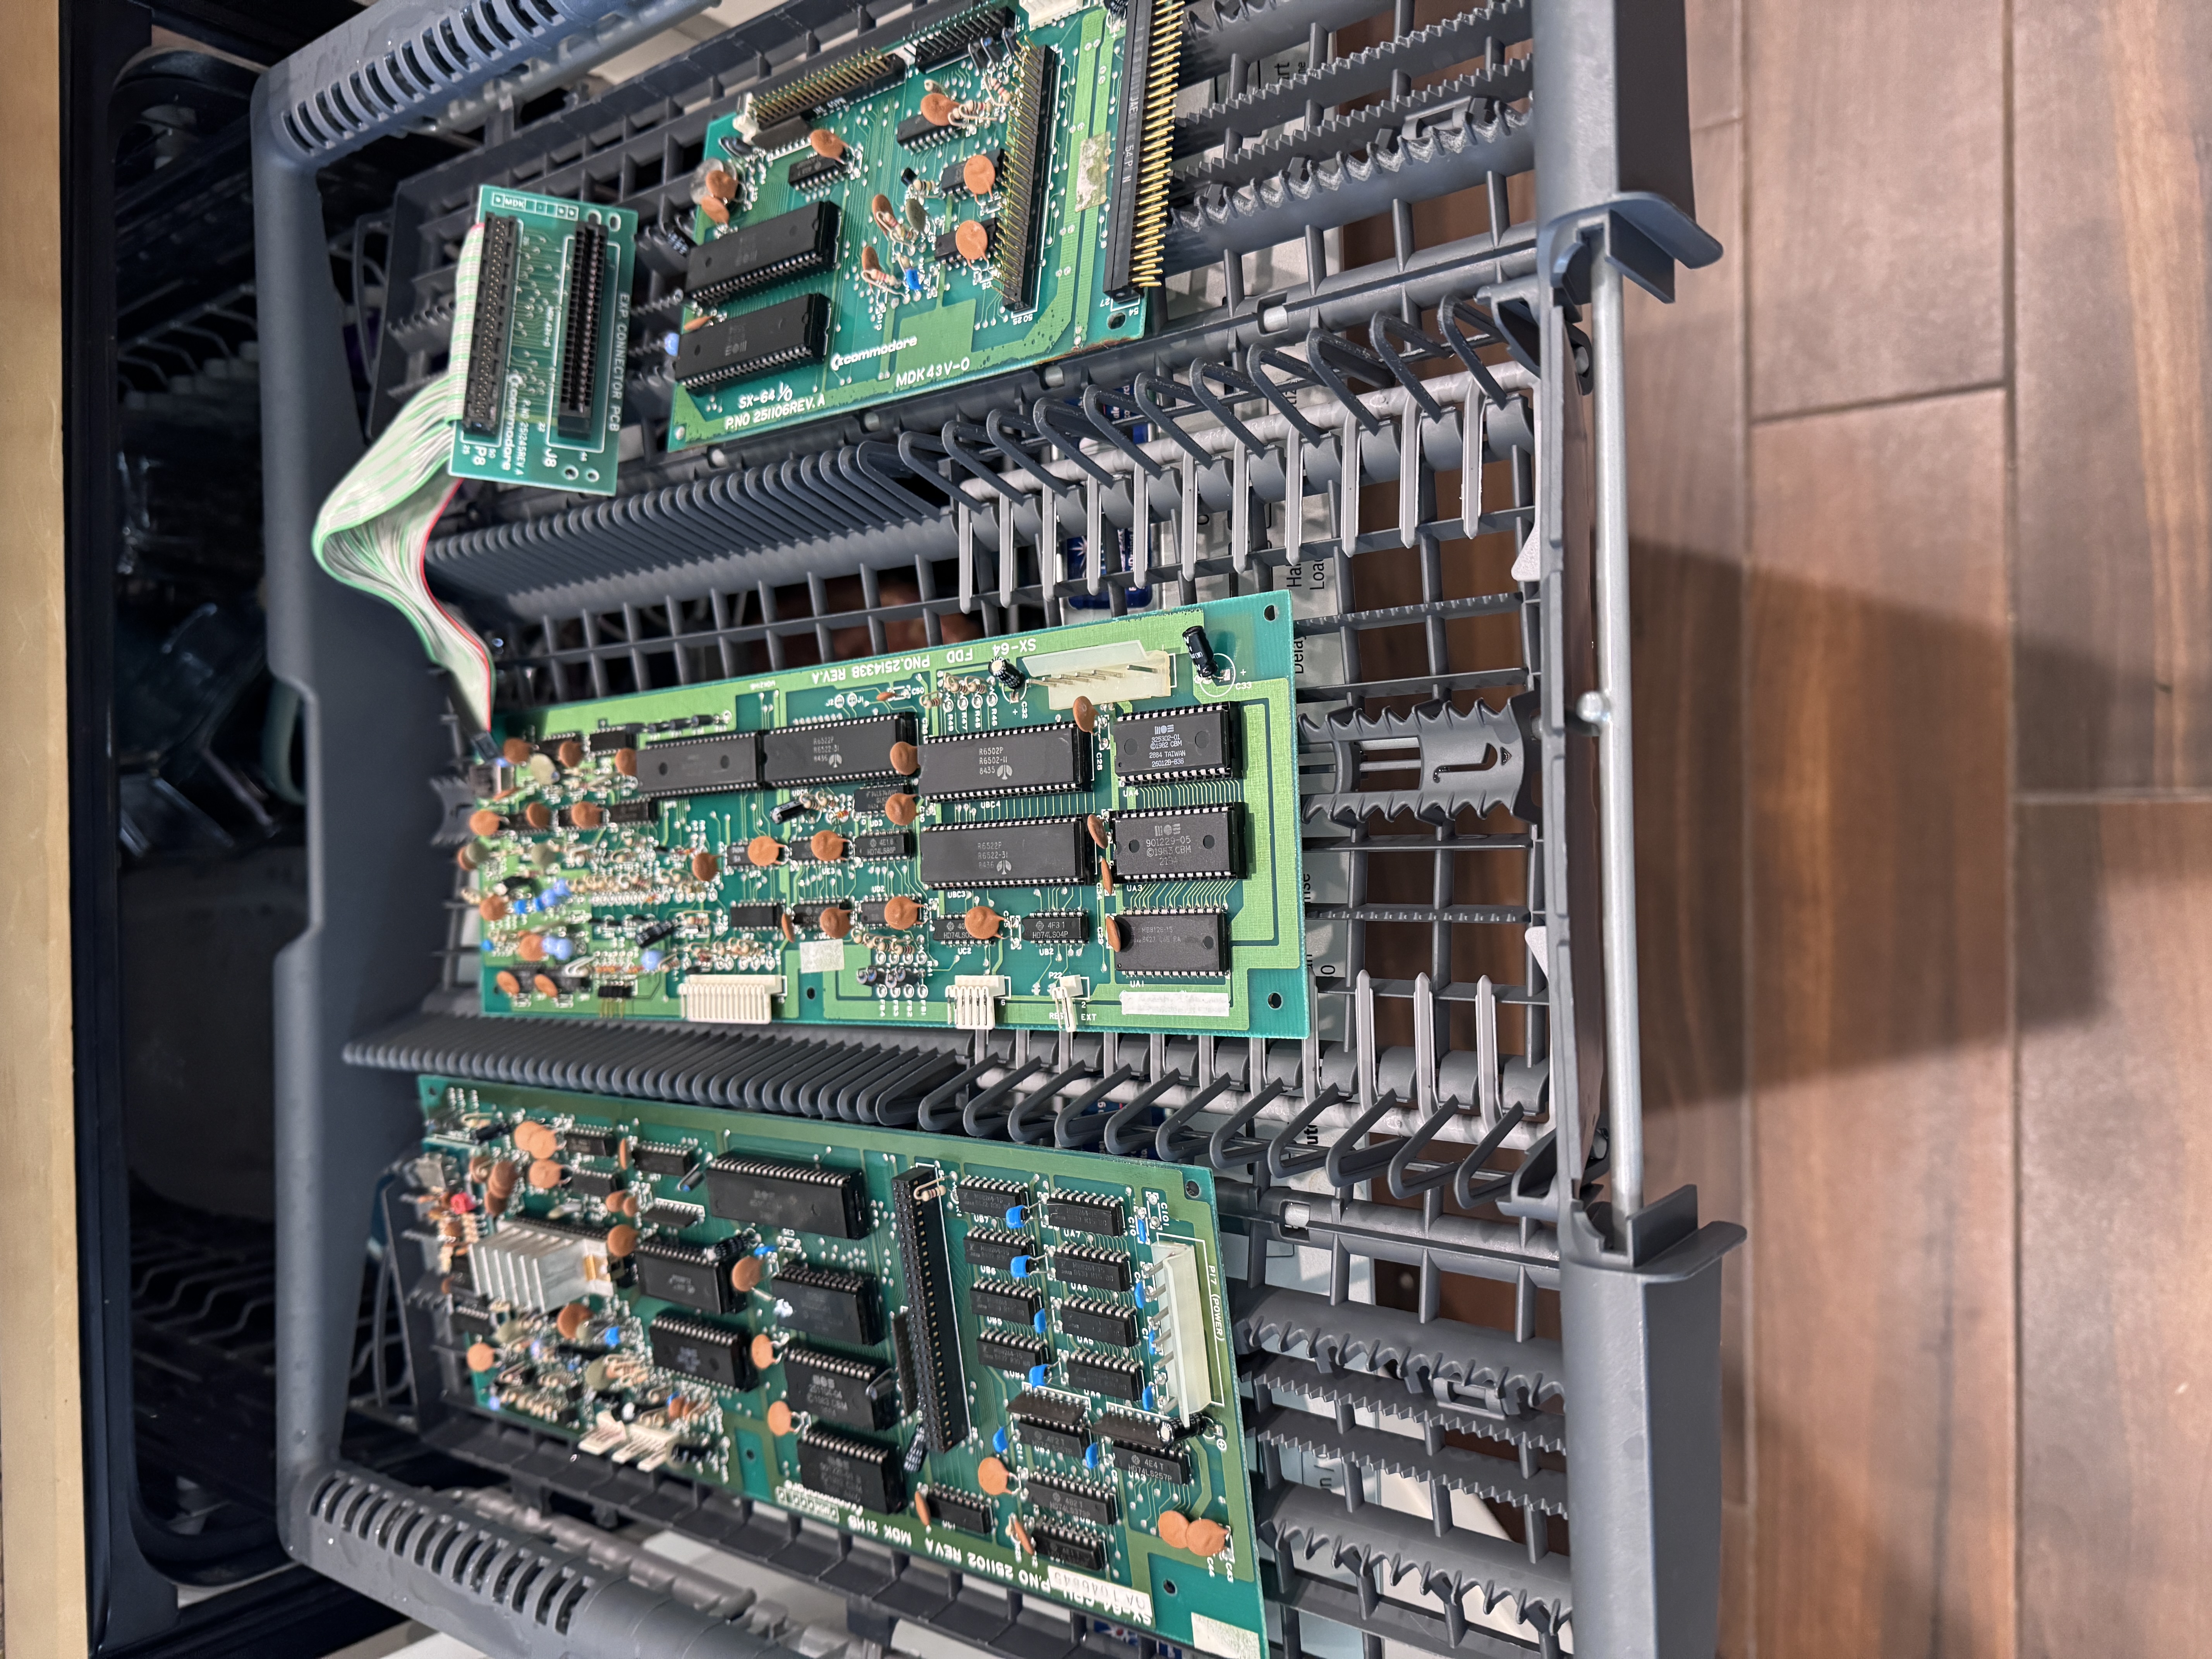
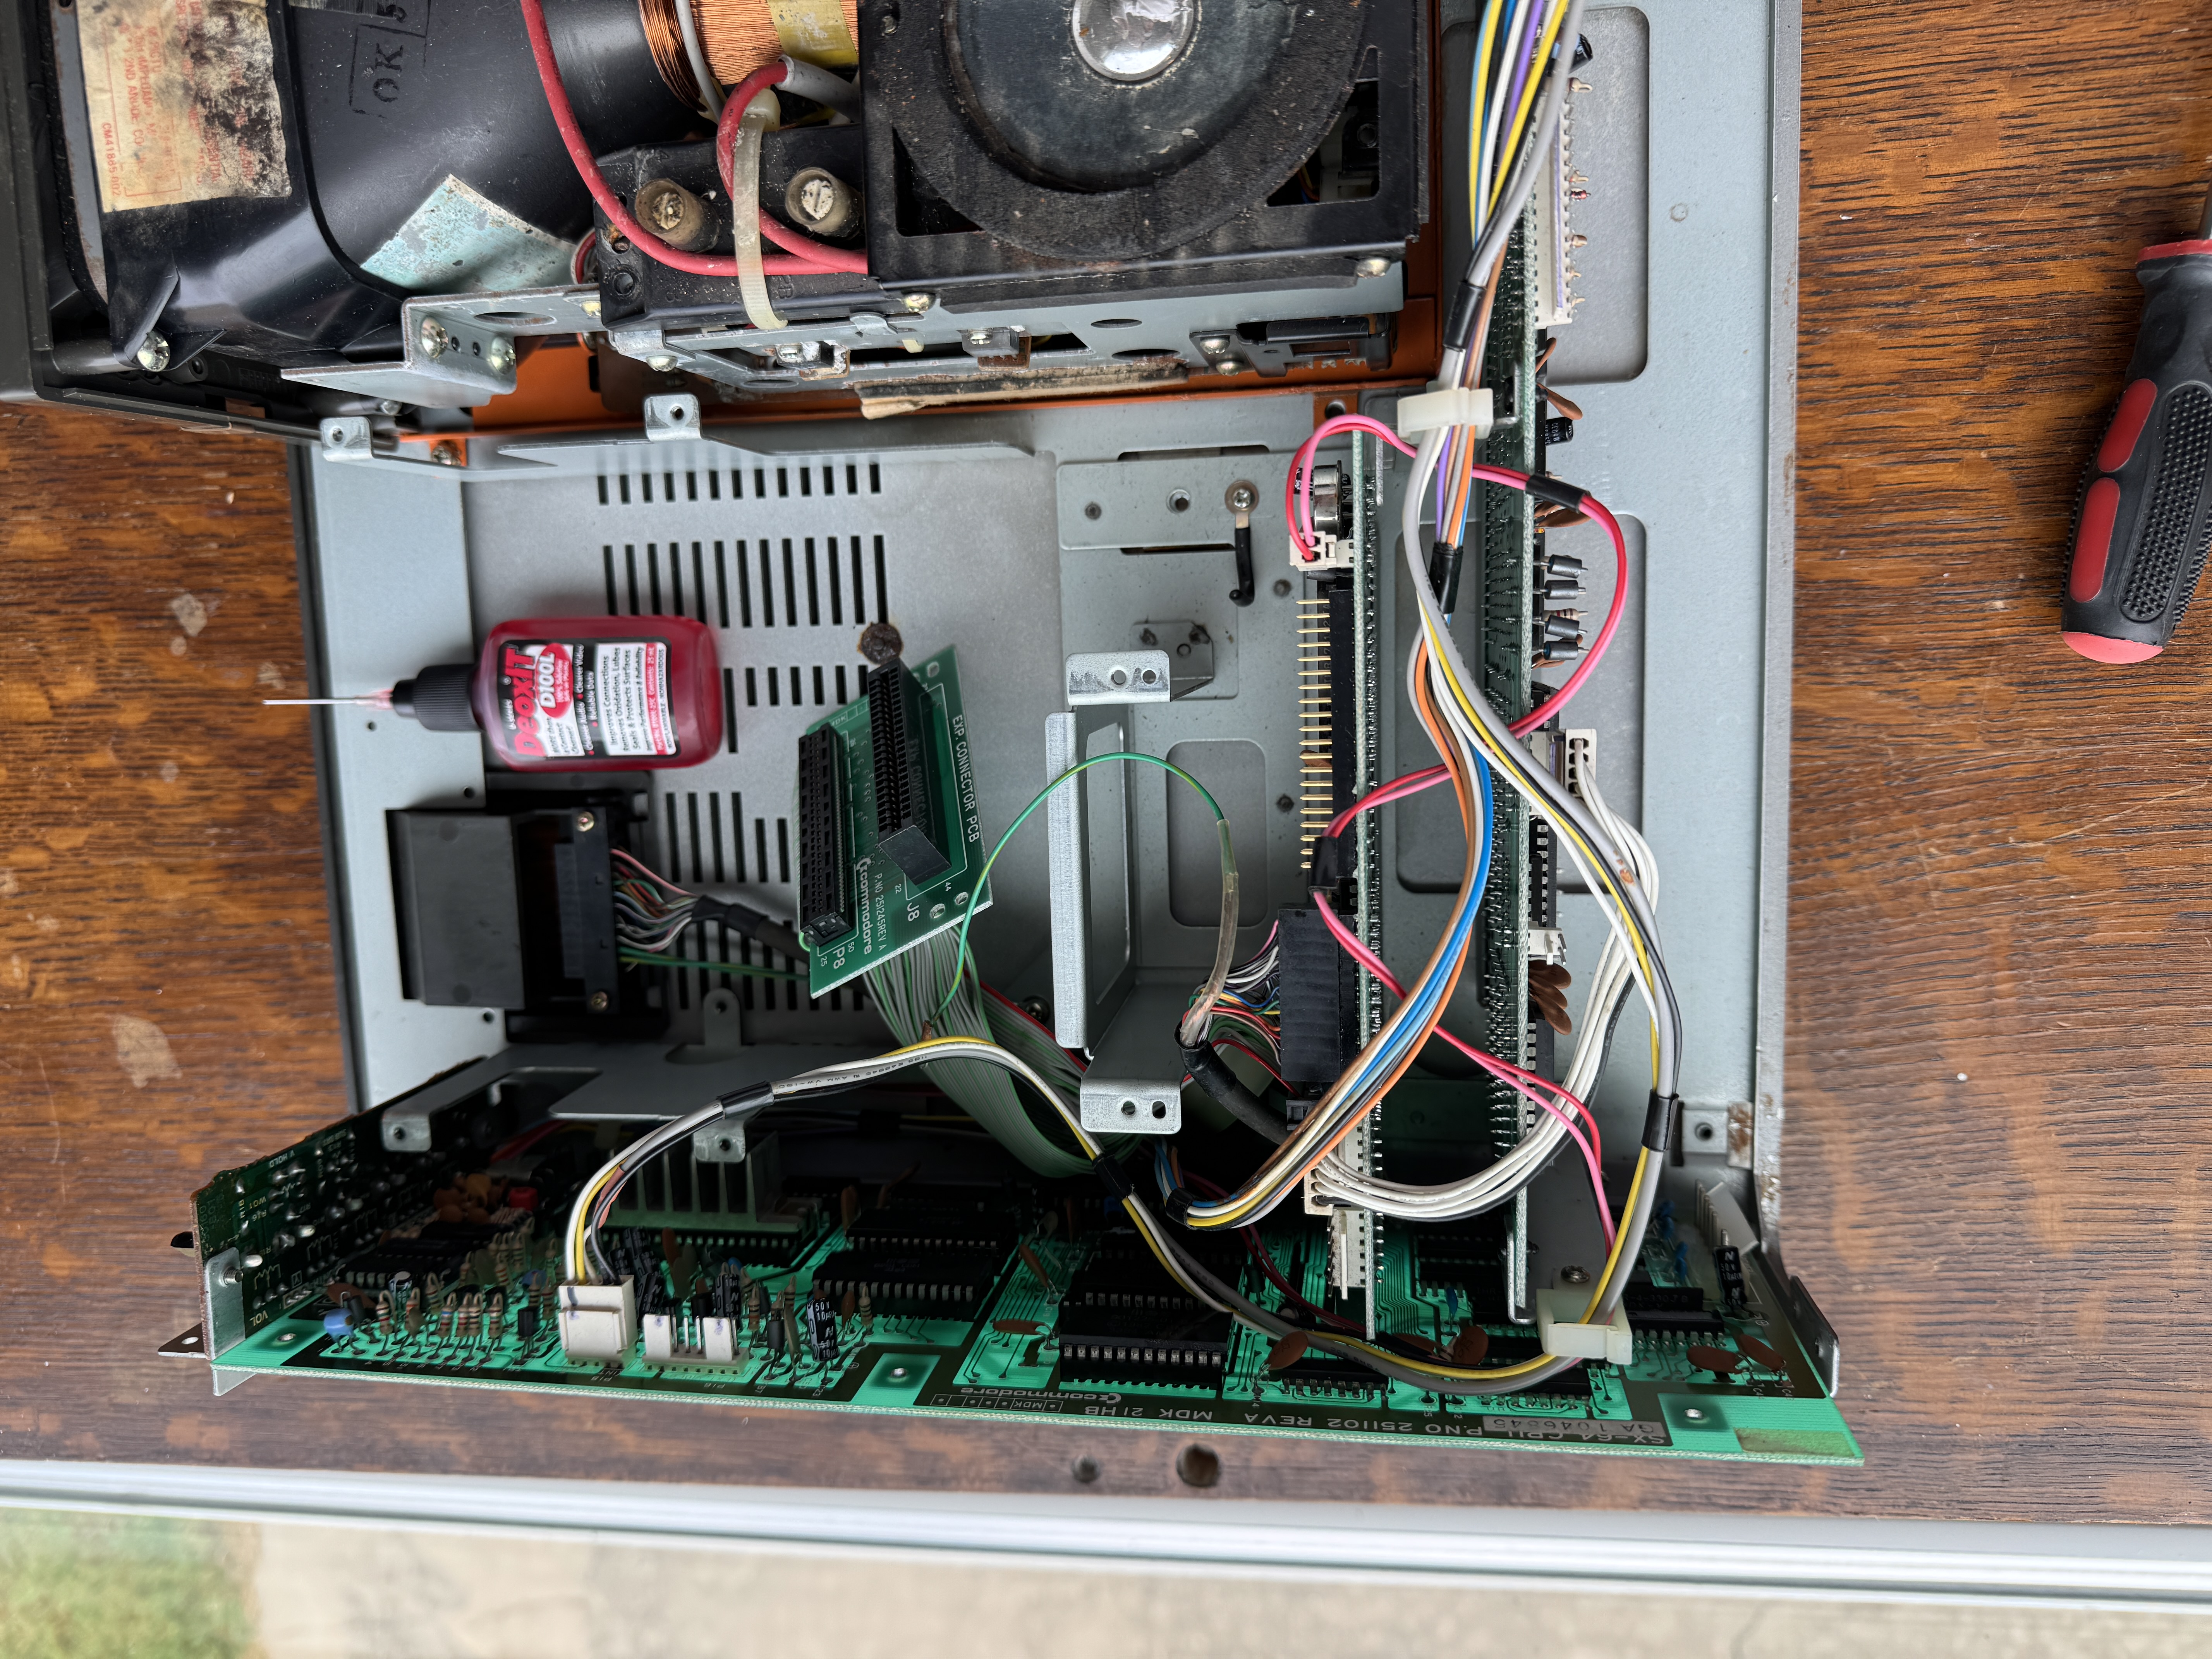
Corrosion on this scale is ruthless, but not everything was lost. After a careful board wash (in my dishwasher), dry (for two days), and inspection, it didn't look that bad. I removed all chips from sockets, applied carefully measured doses of DeoxIT (I literally saturated the sockets and connectors with the stuff), and inspected each board carefully. I was beginning to become cautiously optimistic!
Reassembly
Many fasteners and screws were destroyed, so I made do with replacements from around my shop. While they aren't original, they certainly work. I suspect that somewhere down the line someone will open this thing up and perhaps wonder why they are all so much different, but that's for another day.
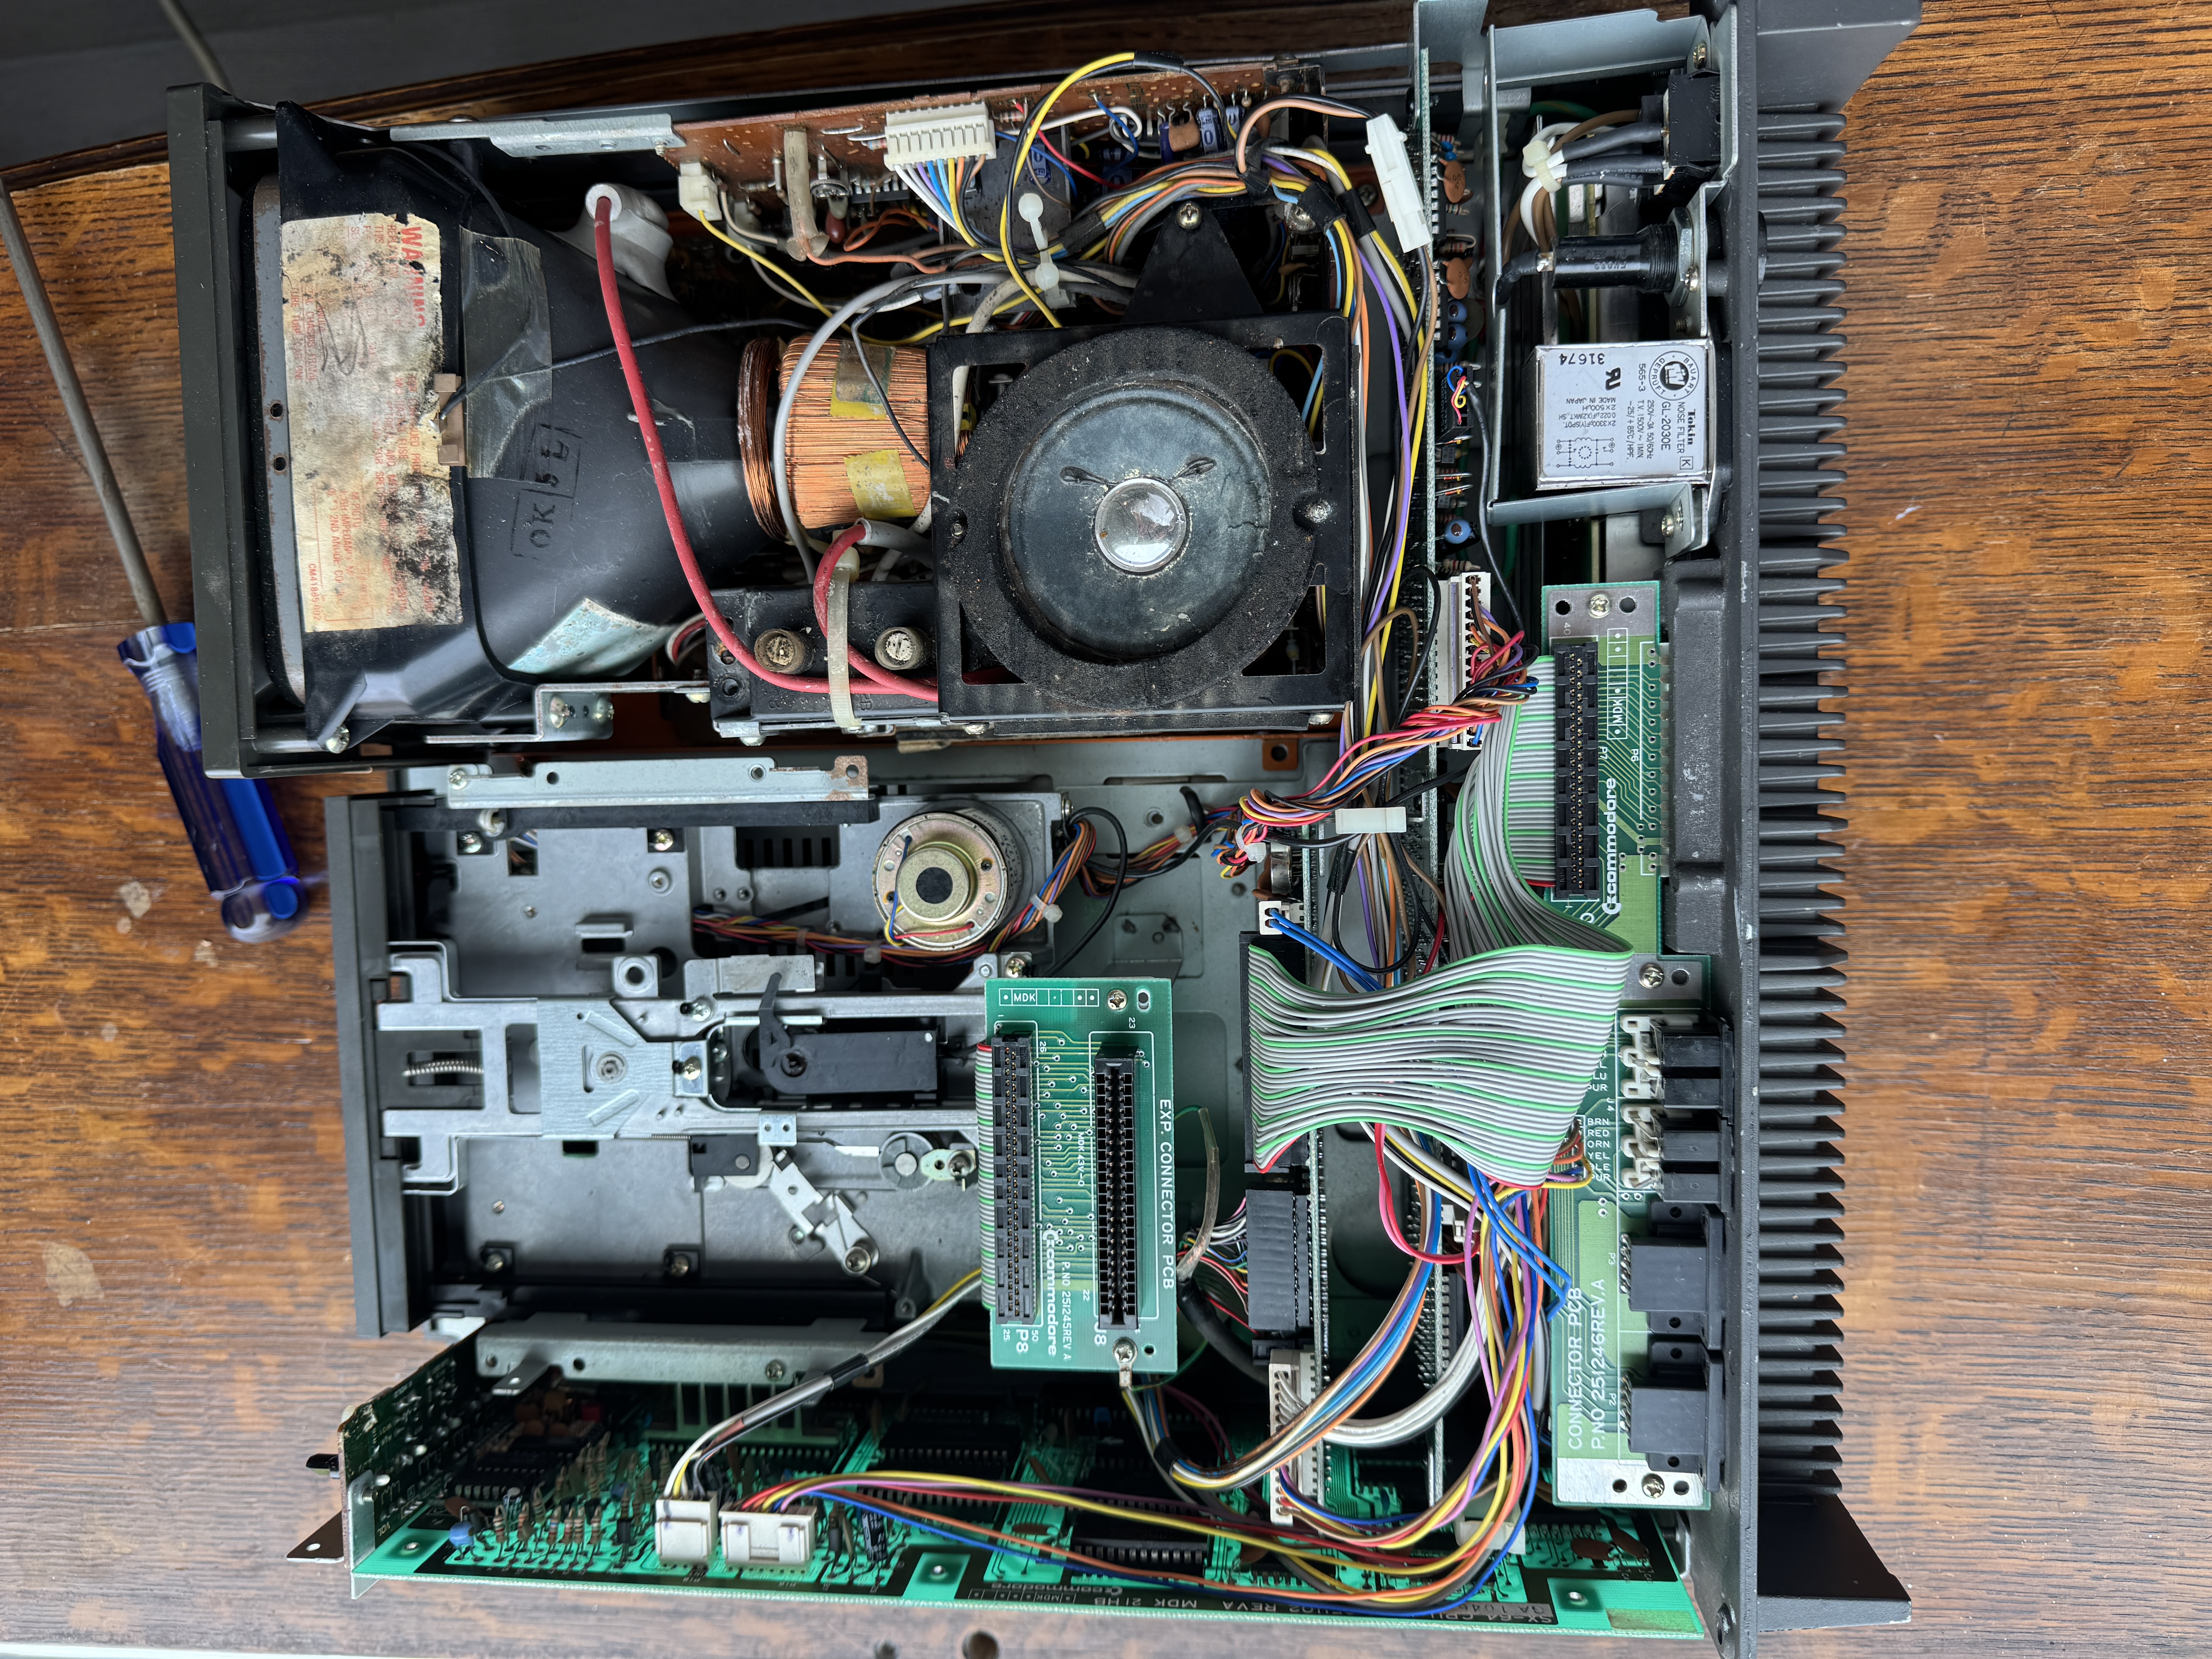
Having secured a replacement chassis and floppy, the reassembly was relatively simple, with no surprises. It was during this process I started worrying about the electronics. I hadn't tested them yet, and really didn't have any idea of what I was getting into with them. After all, the work done so far had certainly been a surprise. What other surprises might be in store?
Pre-Power On Testing
First, I applied mains to the power supply to test voltages.
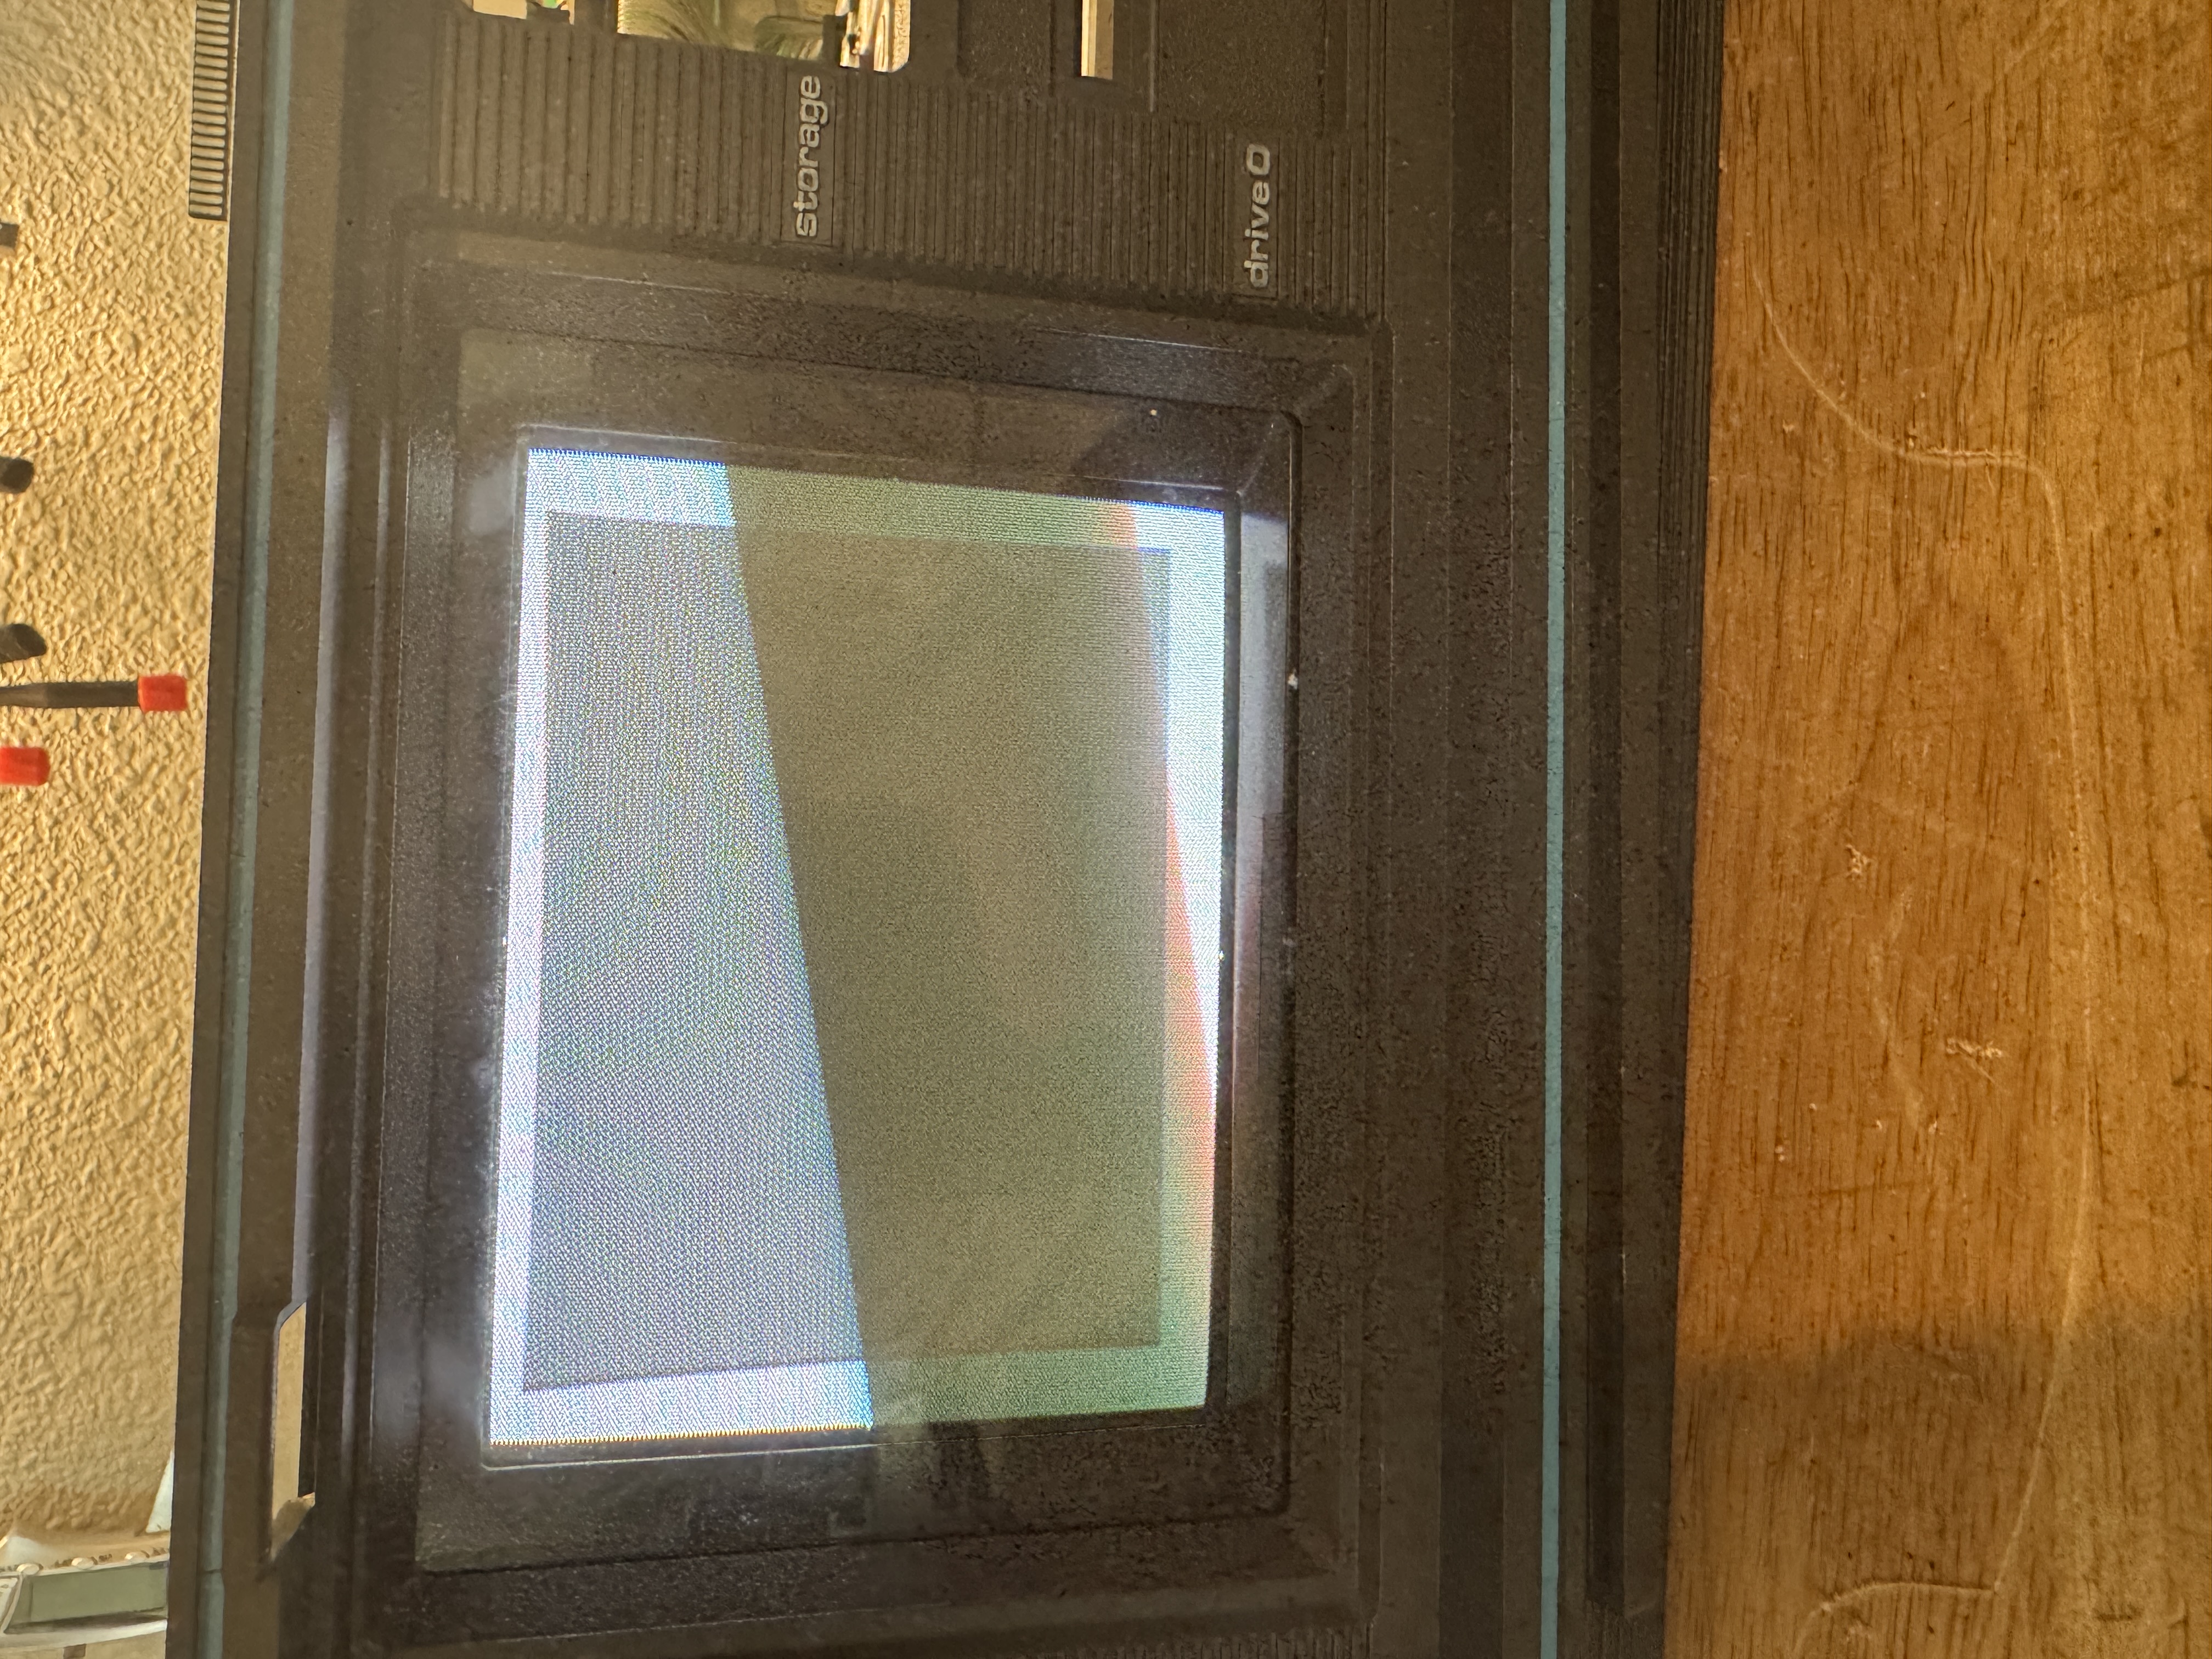
They all all measured fine so next I applied power to the monitor and watched carefully. After a few seconds, the filament warmed, and the screen lit up! Cabling the power connectors to the CPU and FDD board, I flipped on the power with more than a little excitement.
The floppy disk spun, and the red light came on..... and it didn't stop. The screen came up blank white. Whomp-Whomp, it wasn't running. But, I had my dead-test cartridge with me so I plugged it it to see what it told me.
Moment of truth
Actually, I had seen this before. One of the most common failures on an SX-64 is the PLA. It always should have had a heat-sink on it to protect it, so it is a very common failure point, often resulting in spinning drive and white (or black) screens. I popped it out and a replacement in and...
...I re-applied power.
Reflections
This wasn’t a repair so much as an excavation with a soldering iron. I learned again that patience beats panic, that corrosion hides beneath every clean exterior, and that old machines, like old people, can still surprise you. I also learned that even the toughest life lived is a life worth living, scars and all. Now, when I flip the switch, I don’t just see a computer; I see a machine that fooled me with a decent shell and still came roaring back after being hollowed by salt and time. There is more to do. It still needs full reassembly and a proper burn in. By the next VCFSW, I plan to pass it on, not as a trophy, but as a relay baton. I hope whoever takes it home appreciates the journey and adds the next chapter.